This blog has now switched to http://tuesdaytreats.blogspot.com/
A copy of all the posts will also be available at www.thebugbytes.com
February 6, 2012
July 5, 2011
Fun in The Sun!
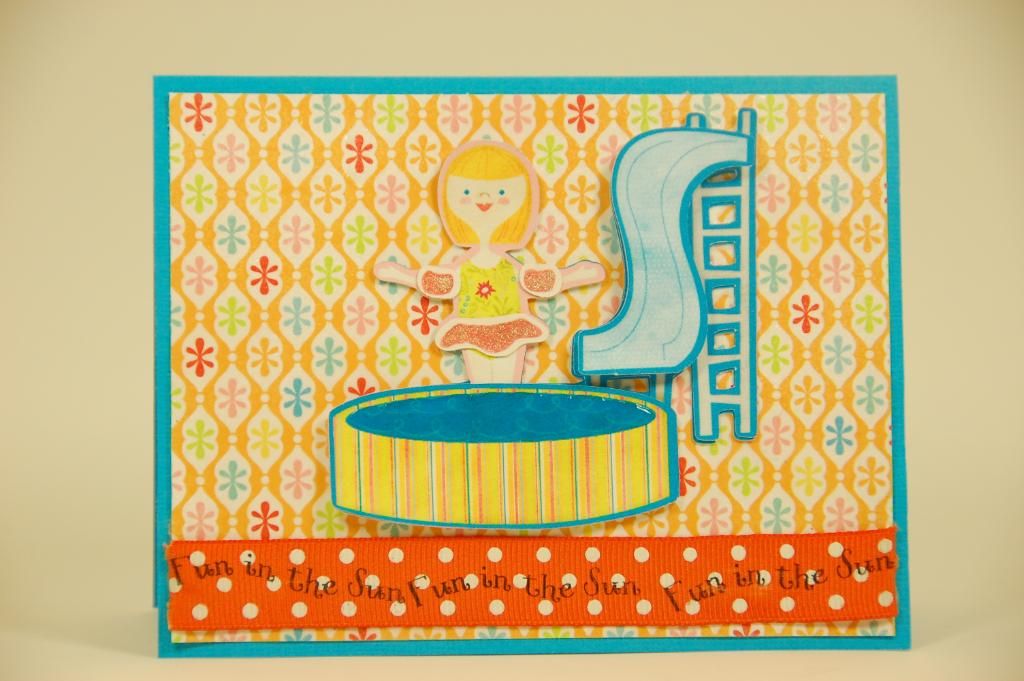
Hi everyone! This is Elizabeth from 217 Creations. Boy have we had our share of sun here in Kansas! Today I am so excited to be sharing this project here at Tuesday Treats.
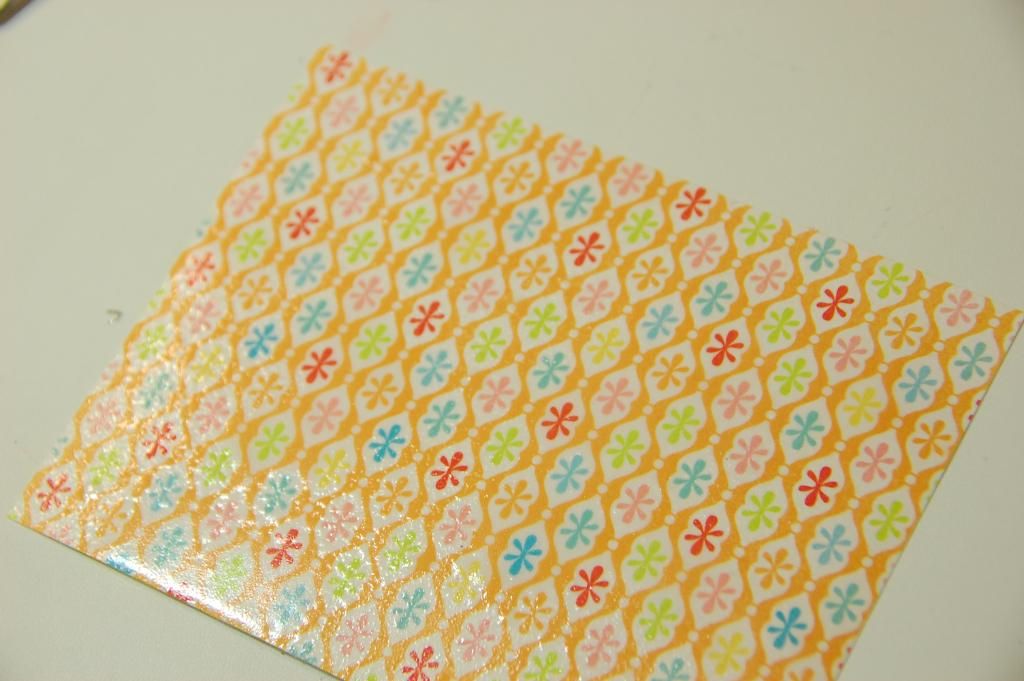
I am so in love with Echo Park Splash paper collection. I started by taking my matting paper and spray a generous amount of Goosebumps spray on it. This is the first time I have used it. The results are very subtle. But in person, it looks cool. This product is a texture spray that makes it look like dewdrops (if you spray light and far away) or puddles (if you spray close and generously). It only took about 20 minutes to dry.
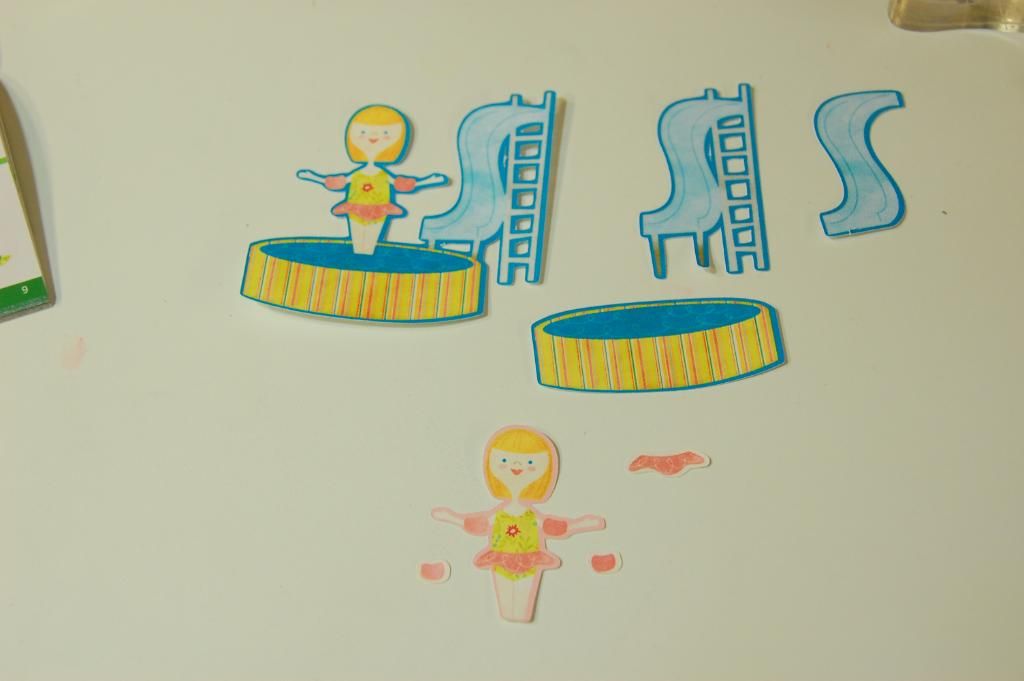
While my paper was drying, I cut my images from Enjoy the Seasons at 3.0 inches in layers.
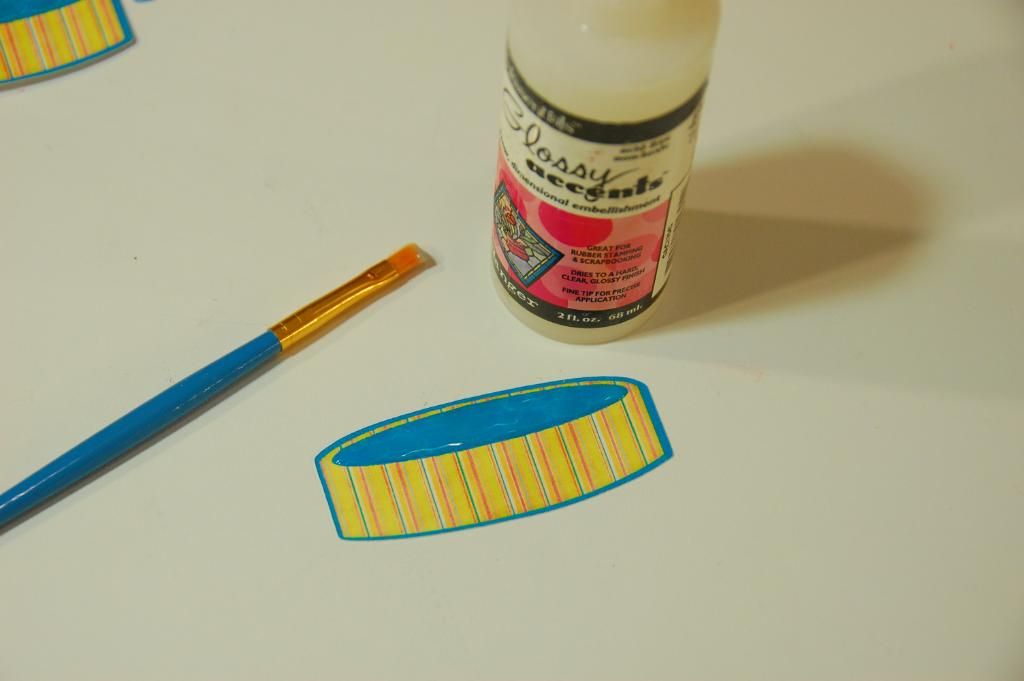
To give the pool dimension, I used a small brush and Glossy Accents to fill it in. I love making these kind of details on my cuts.
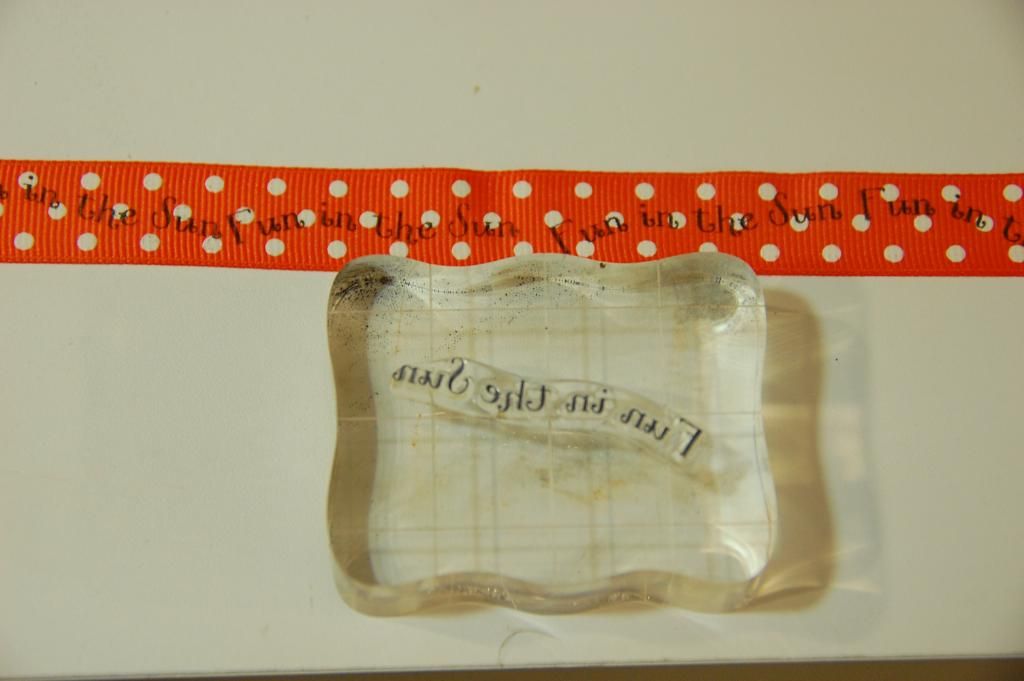
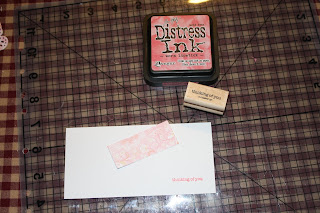
While the pool water was drying, I stamped some grosgrain ribbon with Pink By Designs Summer Vacation. The sentiment says "Fun in the Sun". I curved the stamp to make a wave effect when I stamped the ribbon. I use Black Staz On.
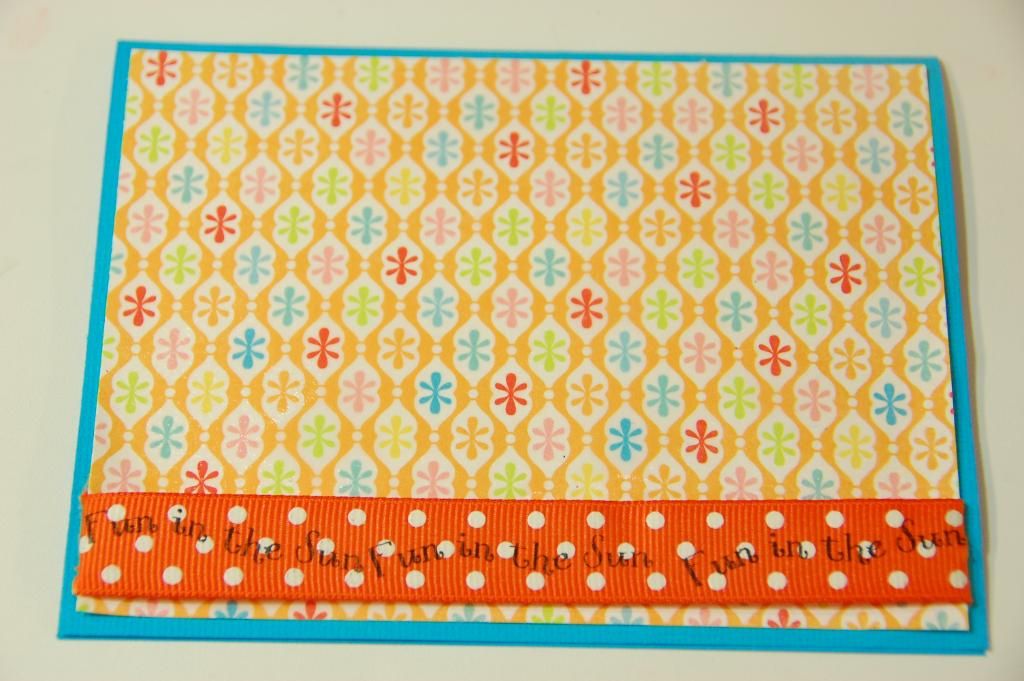
I mounted the matting and the ribbon to the card base.

Finally I added my assembled images to the card. I find using pop dots makes all the difference in the world with Imagine cuts.
I hope you have enjoyed my project! I am always so touched by the lovely comment my readers leave here and on my personal blog at 217 Creations.

June 21, 2011
Kick Up Your Heels!
Good morning and let me tell you that I am so excited about my latest toy!
I wanted to share a project using the new Cricut Expression 2. All this week on http://sweetsassydiva.com we are posting projects using all different carts. I chose a newer cartridge that is preloaded on the E2 called Cricut American Alphabet. It is one of 4 that come ready to use.
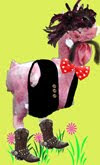
I used a paper stack my Erin Lee Creative called Cowgirl Up. The cowboy boot paper coordinated well with the boot cut on page 27 of the handbook. And as I hit a really good deal on the paper and received the stacks recently, you know that I just had to play with it!
Aren't the boots on the cardstock just so cute!

I did have to flip the icon on the e2 because it just didn't feel right that the boot was facing the opposite direction.
I decided to flip all the cuts and chose 3.5" to cut all the layers out.
What's nice is that as you prepare to cut your paper, there are drop down menus to select your speed, pressure and depth on the E2. I used 80# cardstock so, I selected the option heavy cardstock.

To assemble the pieces, I used my zig pen for the detailed cuts. Plus, liquid adhesives work better with this paper stack.
I decided to do a note card. The base is a finished 4x4". It's easy to make your own card bases. For this one, take a piece if cardstock and cut down to 4x8". Next, take your scoreboard and score at 4".
Next, I decided to do another cut using the same cartridge.

I decided to cut the two shadow pieces as you see above.
The great thing is that I can easily line up my cutting fields by adding carriage returns and brackets that will give spaces.

Then, if you click on the icon on the lower right hand side that looks like a house, it takes you to the next step.
As you see below, I chose two circles. It will now cut each in their corresponding quadrant.

I have a tutorial that goes more in depth on using the E2 along with an informative video at http://sweetsassydiva.com
I used the printed cardstock in the upper left hand side and the scrap piece of dark teal paper in the lower section. You can see it's the same piece that I used for the boot shadow layer.

After the two pieces were cut, I used my ATG scotch tape on the teal layer and placed the scalloped cut on top. It sandwiched the coordinating stash ribbon.

I tied a bow and cut the edges on a diagonal slant.
I adhered the boot to the card and added faux stitching using my white signo pen.

Next, I reached for my stamp stash. I added a sentiment from Unity Stamp Co. "for You".

I hope you enjoyed the E2 project and be sure to check out the rest of the projects that the Sweetsassydiva design team have been working to excite you at http://sweetsassydiva.com
Thank you Pam for allowing me to share my passion with the Tuesday Treats followers!
I hope that you decide to check out my blog and I would love to see you.
SweetSassyDiva
Posted from my iPhone
I wanted to share a project using the new Cricut Expression 2. All this week on http://sweetsassydiva.com we are posting projects using all different carts. I chose a newer cartridge that is preloaded on the E2 called Cricut American Alphabet. It is one of 4 that come ready to use.
I used a paper stack my Erin Lee Creative called Cowgirl Up. The cowboy boot paper coordinated well with the boot cut on page 27 of the handbook. And as I hit a really good deal on the paper and received the stacks recently, you know that I just had to play with it!
Aren't the boots on the cardstock just so cute!
I did have to flip the icon on the e2 because it just didn't feel right that the boot was facing the opposite direction.
I decided to flip all the cuts and chose 3.5" to cut all the layers out.
What's nice is that as you prepare to cut your paper, there are drop down menus to select your speed, pressure and depth on the E2. I used 80# cardstock so, I selected the option heavy cardstock.
To assemble the pieces, I used my zig pen for the detailed cuts. Plus, liquid adhesives work better with this paper stack.
I decided to do a note card. The base is a finished 4x4". It's easy to make your own card bases. For this one, take a piece if cardstock and cut down to 4x8". Next, take your scoreboard and score at 4".
Next, I decided to do another cut using the same cartridge.
I decided to cut the two shadow pieces as you see above.
The great thing is that I can easily line up my cutting fields by adding carriage returns and brackets that will give spaces.
Then, if you click on the icon on the lower right hand side that looks like a house, it takes you to the next step.
As you see below, I chose two circles. It will now cut each in their corresponding quadrant.
I have a tutorial that goes more in depth on using the E2 along with an informative video at http://sweetsassydiva.com
I used the printed cardstock in the upper left hand side and the scrap piece of dark teal paper in the lower section. You can see it's the same piece that I used for the boot shadow layer.
After the two pieces were cut, I used my ATG scotch tape on the teal layer and placed the scalloped cut on top. It sandwiched the coordinating stash ribbon.
I tied a bow and cut the edges on a diagonal slant.
I adhered the boot to the card and added faux stitching using my white signo pen.
Next, I reached for my stamp stash. I added a sentiment from Unity Stamp Co. "for You".
I hope you enjoyed the E2 project and be sure to check out the rest of the projects that the Sweetsassydiva design team have been working to excite you at http://sweetsassydiva.com
Thank you Pam for allowing me to share my passion with the Tuesday Treats followers!
I hope that you decide to check out my blog and I would love to see you.
SweetSassyDiva
Posted from my iPhone
May 31, 2011
It's Tuesday - A simple versatile card using the Cricut Imagine.
Hello everyone! I'm Kris and I'm happy to be joining you on this wonderful Tuesday. I have to say I am a proud owner of the Cricut Imagine since launch. I have a new appreciation for this phenomenal machine every time I use it.
I recently purchased all three Snapshot cartridges and they are awesome! For this card I'm using the Nature cartridge. It has some fantastic images on it!
This card is pretty generic and you can use almost any sentiment on it from sympathy, thinking of you, birthday, mother's day, and more.
Let's get started!
To make this card you will need:
- Paper - White, light Pink, Pattern paper printed from Lori’s Garden (page 42 left pattern) and Snapshot – Nature Imagine cartridges wild flowers (page 9)
- Punches - Martha Stewart Monarch Butterfly, Stampin’ Up – Word Window Punch & Modern Label Punch
- Ink - Tim Holtz Distress Ink – Worn Lipstick
- Tim Holtz Damask embossing Folder
- Stampin’ Up – Teeny Tiny Wishes Stamp Set
- Seam Binding in Light Blue
- WR Memory Keepers Corner Rounder
- Pop Dots
- Glue Dots
- Tape Adhesive
- Cuttlebug, Sizzix Big Shot, Vagabond, or other embossing machine
To get started, print and cut your pattern paper on your Cricut Imagine. I used the proportional rectangles found in the stock images on your Imagine. Select the 5:7, set the size to 5. This will give you a 5 x 7 finished rectangle. Flood fill this with the image on page 9 of the Snapshot:Nature cartridge. You will be cutting this image down to it's final size of 3" x 4".
[If you don't understand the proportional rectangles or how to use them, I have explained them in detail on my blog. Click here to go directly to the post.]
Insert the Lori's Garden cartridge and select the 2:3 rectangle on the stock images. Set the size to 2 and flood fill with the image on page 42, left hand side. This will be used for the Butterfly and Sentiment.


Trim the flower pattern paper to it's final size of 3" x 4". You can use this size image to make 2 cards. I used the left side of the image for my card. Round the corners with the 1/4" side of the corner rounder.
Cut a piece of light pink paper 3 1/8" x 4 1/8" and round the corners using the 1/4" side of the corner rounder. Adhere the pattern paper to the pink and set aside.

Stamp your sentiment in Worn Lipstick and punch out using the word window punch.

Adhere this piece to your pattern paper first

Then punch out with the modern label punch.
This way you aren't fighting to get that little piece of paper perfectly centered on the modern label!
Add pearls to the ends.

Punch the butterfly from the pattern paper from Lori's Garden.

Using the Tim Holtz Damask embossing folder, emboss the front of the card base.

Everything is ready for assembly.
Adhere the flower pattern paper to the top center of the card.
You want this towards the top so the sentiment fits below.

Roll a glue dot to form a barrel shape and apply to the body only of the butterfly.
Adhere to the top right corner of the flower image and carefully bend the wings to add dimension.
Add seam binding to the fold side of the card and tie a bow at the lower edge of the card.
Add the sentiment using pop dots below the flower image.

The finished project. These are very easy to do and take almost no time to complete.
Hope you enjoyed!
May 24, 2011
You're my Sonshine
Good Morning!
This is Pam today with a layout.
I have recently started liking layouts and for the very first time decided to make my own sketch and play. I have never followed a sketch before in all the 4 - 6 layouts I made and just went as my brain dictated. But I decided that this time I would make a sketch to follow. I did change many elements but for the most part stuck to it. I am quite happy with the way the sketch and the layout turned out.
Here's a simple sketch I made


I have used cartridge baby steps and the title is from Calligraphy collections and Plantin school book. Oval is from George and the labels are from Lacey labels lite. The paper ribbon is from MS elegant cake welded repeatedly. The pattern paper on left is from K&Company and the right one - the blue dotted one is from my mind's eye.It is so shiny and lovely! The solid papers - yellow, orange and blue are from DCWV and the green bits are from pack papers I got from Michaels (it was all pastel shades cut in different sizes and stacked up for 3 dollars)
Now I felt the embellishments - babies and the bowl cup and even the title was too small to cut properly as title was about 0.8 - 0.9 inches. Even though the baby is big the layers was too small to piece. So I wanted to use markers and color them in. So I added the images for marker on one page in the Gypsy and in the 2nd page I added the cutting part. In case of baby- I added the image and used hide and contour to hide the cheeks. In case of cups and bowl I added all layers as a group and then used hide and contour to get rid of portions I didn't need and then placed everything one on top of another to form a whole image. Then on next page I placed the image for cut. Turn on the preview of previous page and you can also note down the x and y and use that to manually place it after zooming to max. So you first put in marker (remember to protect you drawing area while changing marker and blade) and cut. Then DO NOT UNLOAD but RETURN TO DESIGN. Then change your marker for blade and then go to the next page and cut. Same thing for title though in this case I just placed a label shape on the 2nd page.
Here are some close ups


For the writing for tabs it is my handwriting but I had previously used fontifier and made a font out of my handwriting. I sized it in photoshop to about 10 points instead of 12 as I wanted the sentence to be about 2 1/2 - 3 inches long only . You can of course use word but I like photoshop . I then printed it out and cut it and glued it on to a green cardstock strip and glued it on. Then I colored the pieces . Assembled the layout and added some brads and used some twine and that's a one page layout done :)
Thank you for reading. I would love to read your sweet comments so do leave some.
Have a great week!
Pam
This is Pam today with a layout.
I have recently started liking layouts and for the very first time decided to make my own sketch and play. I have never followed a sketch before in all the 4 - 6 layouts I made and just went as my brain dictated. But I decided that this time I would make a sketch to follow. I did change many elements but for the most part stuck to it. I am quite happy with the way the sketch and the layout turned out.
Here's a simple sketch I made

And the layout

Now I felt the embellishments - babies and the bowl cup and even the title was too small to cut properly as title was about 0.8 - 0.9 inches. Even though the baby is big the layers was too small to piece. So I wanted to use markers and color them in. So I added the images for marker on one page in the Gypsy and in the 2nd page I added the cutting part. In case of baby- I added the image and used hide and contour to hide the cheeks. In case of cups and bowl I added all layers as a group and then used hide and contour to get rid of portions I didn't need and then placed everything one on top of another to form a whole image. Then on next page I placed the image for cut. Turn on the preview of previous page and you can also note down the x and y and use that to manually place it after zooming to max. So you first put in marker (remember to protect you drawing area while changing marker and blade) and cut. Then DO NOT UNLOAD but RETURN TO DESIGN. Then change your marker for blade and then go to the next page and cut. Same thing for title though in this case I just placed a label shape on the 2nd page.
Here are some close ups


For the writing for tabs it is my handwriting but I had previously used fontifier and made a font out of my handwriting. I sized it in photoshop to about 10 points instead of 12 as I wanted the sentence to be about 2 1/2 - 3 inches long only . You can of course use word but I like photoshop . I then printed it out and cut it and glued it on to a green cardstock strip and glued it on. Then I colored the pieces . Assembled the layout and added some brads and used some twine and that's a one page layout done :)
Thank you for reading. I would love to read your sweet comments so do leave some.
Have a great week!
Pam
April 26, 2011
60th Birthday Boxes
Thank you for letting me be this weeks guest designer. My name is Flo and I am from New Zealand.
My brother in law was turning 60 and the delema of what to give someone who is 60 but still thinks hes only 30! who had said NO PRESENTS!
I did an online class where we made a star box and after finishing the star thought the same principles could be put to great use with any shape. I was right and I came up with this box in the shape of a 6 and an 0. These are proper boxes that I filled with mini chocolate bars for him. I often find it hard to think of presents for men but this went down a treat and was so easy to make with the help of the cricut.

This is the 60 boxes together.

This is where I have taken off the lids so you can see inside. There was chocies inside by the time they got to the recipient.

The front of the zero showing the plastic in the hole in the centre and the tools on the top. I also inked the edges.
Below is the sides of the box decorated with ribbon and happy Birthday peel offs


How I did the '60' boxes
What I did was cut out my 2 numbers the 6 and the 0 (zero) on my cricut expression using the Cricut Mickey Font cartridge using shadow at 5.5 inches.
Using Cricut design studio (my Gypsy had just got sick :-( , (but it is well and working again now) I cut a 6 and a 0 (zero) in DSP (that comes from a stack I have in my very large stash) and another 6 and 0 in DSP that had the centre holes hidden on hide contour (this was for the bottom). I did the same cuts again in plain cardstock.
I then cut the sides for the boxes (in DSP) deciding that I would have a slightly shorter lid than bottom to the box so cut the lid sides at 1.5 inches and the sides for the bottom at 2 inches. The length (ahh this was a challenge).

This is the long side of the paper used for the side with the top scored, and this is the 6 (looking at it backwards)
I started by scoring along the long side of my paper for the sides, at 1/2in.

I then marked the length of the top of the 6 (I have marked it in pen in the drawing above), I scored vertically the side of the top of the box so I would know where it needed to be folded and maked the point where the acute angle of the 6 was (that's the sharp angle). From there I cut 1/2 in cuts the length of the side strip into the strip to where the score mark was. I then glued the edge to the top of the plain cardstock. When the paper ran out I just added another strip till I had the outside completed.

When I had the side glued to the top of the box I then added the plastic onto the hole in the top of the box and added the DSP 6 to the top on the outside then on the inside it has a nice tidy finish and on the outside it looks good too. I then did the same for the zero.
I cut tools out of the Cricut Lite Handiman cartridge on the imagine using colours from the Snapshot texture cartridge. I cut them 1.7 - 2in in size and layered them. The ladder side is so thin I wondered how it had cut so well but it did. The saw has a little jagered edge just like a real saw has.
I finished it off by added a two tone brown ribbon round the base of the top of the box, again I had this ribbon in my stash.
Recipie for one number
Cut two of the number from plain cardstock and 2 from DSP (designer series paper)
For the top side measure how long you want the side depth and add 1/2 in or 1cm to this measurement. Cut strips of DSP enough to go around the number you are doing. You can join these side pieces especially if they are in patterned paper as the joins don't show as much or you can camoflage the joins with cutouts ie like the tools.
For the side of the bottom do the same. I made the bottom side of the box bigger than the top so the top sat up a bit.
When I put the sides on the top I did this so the cut pieces were over the top of the plain cardstock and then I glued the DSP number over the top to cover the side cuts that glued to the top.
With the bottom of the box I glued the sides to the number so that the cut pieces were on the top of the plain cardstock and then placed the DSP inside the bottom so it again covered the cuts that were glued.
I did make the top and the bottom exactly the same size as it easily squishes together.
I would suggest that if you would like to do something like this practice on scrap paper to see how it works.
I loved the final result and so did my brother-in-law, he didn't like being remined he was 60 so I suggested he turn the numbers round and become 06 then someone suggested he was lucky it wasn't the other way round showing a 9.
Thanks for looking and thanks again to Pam and the crew for allowing me to show you what I have done.
Flo
from

April 19, 2011
Mother's Day Layout
Hi everyone. My name is Yolonda and I am so excited to be this weeks guest designer on Tuesday Treats. I had a great time last year and I'm happy to be back.
For my project this year, I made a layout. It is inspired from the Cricut "Ultimate Creative Series - Scrapbooking for Everyone" dvd, Mother's Day Layout. I absolutely love the series, it is chocked full of great ideas.
I used the Gypsy to make this project, but it is not necessary. The project can be made just using the Expression or the Imagine. I chose to use the Imagine since I didn't have any of the papers on hand. Using the Imagine pattern cartridges makes it so easy. You have all of the papers you could ever want.

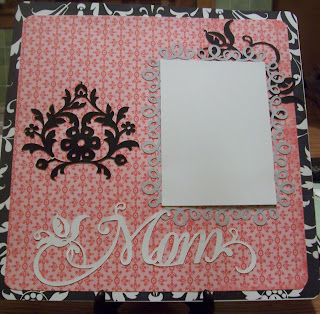
Using the Audrey Imagine cartridge I printed a whole sheet of the black and white pattern paper.

Using the Imagine More Cards Imagine Art cartridge I printed a whole sheet of the pink pattern paper.
Using the Ultimate Creative Series cartridge (Bonus 2) I cut the large Filigree at 4 inches in black and the 2 smaller Filigrees at 3 inches in black. I also cut the phrase Mom at 3 inches in white. Don't worry if you don't have the Ultimate Creative Series, all of these cuts are also on the Mother's Day 2010 Seasonal Cartridge.

Using the Elegant Edges Circut cartridge I cut a swirly frame at 7.5 inches in gray.

Once everything was cut. It was time to assemble it.


And the finished layout...
Recipe:
Audrey Cricut Imagine Cartridge
Imagine More Cricut Imagine Cartridge
Ultimate Creative Series -Bonus 2 or (Mother's Day 2010 Seasonal) Cricut Cartridge
Elegant Edges Cricut Cartridge
Bazzill White Cardstock
That's my project. Thanks for taking the time to view it and I hope you enjoyed it. Be sure to leave me a comment. I would love to hear what you think.
For my project this year, I made a layout. It is inspired from the Cricut "Ultimate Creative Series - Scrapbooking for Everyone" dvd, Mother's Day Layout. I absolutely love the series, it is chocked full of great ideas.

I used the Gypsy to make this project, but it is not necessary. The project can be made just using the Expression or the Imagine. I chose to use the Imagine since I didn't have any of the papers on hand. Using the Imagine pattern cartridges makes it so easy. You have all of the papers you could ever want.

Using the Audrey Imagine cartridge I printed a whole sheet of the black and white pattern paper.

Using the Imagine More Cards Imagine Art cartridge I printed a whole sheet of the pink pattern paper.

Using the Ultimate Creative Series cartridge (Bonus 2) I cut the large Filigree at 4 inches in black and the 2 smaller Filigrees at 3 inches in black. I also cut the phrase Mom at 3 inches in white. Don't worry if you don't have the Ultimate Creative Series, all of these cuts are also on the Mother's Day 2010 Seasonal Cartridge.

Using the Elegant Edges Circut cartridge I cut a swirly frame at 7.5 inches in gray.


Once everything was cut. It was time to assemble it.


And the finished layout...
Recipe:
Audrey Cricut Imagine Cartridge
Imagine More Cricut Imagine Cartridge
Ultimate Creative Series -Bonus 2 or (Mother's Day 2010 Seasonal) Cricut Cartridge
Elegant Edges Cricut Cartridge
Bazzill White Cardstock
That's my project. Thanks for taking the time to view it and I hope you enjoyed it. Be sure to leave me a comment. I would love to hear what you think.
Subscribe to:
Posts (Atom)