Knowing is not enough; we must apply! - Johann Wolfgang Von Goethe

Welcome & Copyright & Disclaimer

Welcome to Tuesday Treats. Hope you have a pleasant journey browsing and getting inspired by the projects you find here. We appreciate and treasure your comments so please leave us some blog love and comments. But before you start your journey here just a small note . Do please read and then you can continue on. Copyright: This blog has a many designers showcasing their projects. Please look up their individual site to check their copyrights for any infringements. My files & projects are also all copyrighted. They can be used as inspiration and for personal gifts only but cannot be used in classes, in magazines or for contests. Please look in the side bar for more details on the copyright. Disclaimer: The designer's designs belong to them and them only & not to TuesdayTreat and The TuesdayTreats will not be responsible or liable in any way for any results or consequences from those designs.

March 29, 2011

Glittery Hello Birdie

Hello everyone!!  Magoo here, it's been quite some time since I've shared anything on Tuesday Treats.  It's nice to be back - I missed everybody :)  Today is a fluke, for you see I'm also scheduled to do a post over at She's a Sassy Lady today.  Seeing as I was really pressed for time due to family commitments, and I wanted to post something here too, this is a cross post of my project on SASL.

Now on with the show....I'm not sure why - but for some reason birds came to my mind while I was thinking of what to make for this post.  Don't be alarmed - Chester was not harmed or used in the making of this tutorial.

And this is what we'll be making today:


Cart info:
To start with this card gets all of it's interest from the use of many layers.  I used cuts mainly from Cindy Loo and used Plantin Schoolbook for a circle that was used.

Size Info: the overall size of the card is 5" in diameter - but this doesn't include the leaves that extend on the right side.  So it's just a tad wider than 5".

Where to begin?  Well I'll start with a screen shot of page 1 on my gypsy.  Since that is what I started cutting first I will show you how I laid it all out on the first layer:

As you can see I have quite a bit going on here, but it's not so bad.  I know that the leaves on the left side are what I'm planning to layer on TOP of the leaves on the right.  Why the circle attached to the leaves?  The tree branch image (bottom left) leaves quite a bit of negative space underneath and I wanted it to be white, so by welding leaves onto a circle not only does it give me a white background (no matter what colour I choose for the base of my card), but it also gives my 2nd layer of leaves a sturdier base when I glue them on.  I have hello welded together 5 times as I plan to glue them all together to give it a 'chipboard' effect when I attach it to the card.

Onto to layer 2-
As you can see I've welded 2 of the same image together to make the base of my card.  Before I welded anything together I used my Hide Contour feature (found on the the advanced tab) to hide every single cut on the inside of the image.  Then I simply copied and pasted it, then grouped and welded them together.  I did this so that my image I want to layer on top will line up perfectly with the scallops on the base (the image on the top right side).


This button with the two little gray arrows is the HIDE CONTOUR button.  Have your image selected then touch on this button.
It will then take you to this screen where you can use the metal button on the left to 'scroll' through all the cuts on that image.  The cut you are currently on is highlighted in red on the screen, when you want to hide it, simply touch the hide button and it will be grayed out.

Here is an example of the great purpose of HIDE CONTOUR.  Instead of wasting a lot of paper just to cut out the BIRD, I used hide contour and hid most of the cuts.  Instead of using 5" of paper, I used closer to 2" cool isn't it?
 Now that I have my card and all of it's many layers all figured out and laid out on my Gypsy, I've gotten my mats ready with paper for cutting.  I always make sure to check which way my arrow is facing!! very important.  I've wasted a lot of paper putting the mat in the wrong way.
On the left is the paper for the base of my card, the top right will be for the top layer, the gray square is for my little birdie I want to layer on top of the patterned paper for more dimension.

Here you can see my circle with the leaves attached (this is to go underneath the patterned paper circle).  The top right is my leaves that I will use to layer on top of the white base.  And all of my hello's.
The birdie needed a little bit of trimming - no problem get your x-acto knife out and make a few tiny cuts and the bird is free!
Next I glued all of the Hellos together.  You can use a xyron machine or just plain glue - I used Scotch quick dry for this and it worked great.  However, when applying glitter to the top layer I swear by my xyron machine for glitter.  Remember - FACE DOWN!!  through your purple sticker maker.  Peel it away and pour your glitter all over.  Give it a tap and set it aside.


I moved on to the birdie since I had my xyron machine out.  I ran it through the machine and then dumped a whole lot of micro beads onto a lid and put my birdie sticky side down into the beads.
Martha Stewart mircro beads in 'sterling'

Again because my xyron was out and I knew I wanted to glitter my leaves I ran my leaves through the xyron as well. I had originally planned to glitter them green - but it just wasn't going with the paper.  So I dug out a colour of glitter called Hemattie (MS).  I peeled off the xyron wrappers and poured glitter over top, then I took a plain piece of paper and pushed it down on top squishing the glitter down onto the cut. Tap off the excess and set the leaves aside.
glittering the leaves, so pretty :)
 I dug out my cuttlebug and ran my white layer through it just to give it some interest beneath the pattern paper layer.  I purposely left the leaves out of the folder so they would remain flat, this would make gluing me glitter leaves on so much easier.
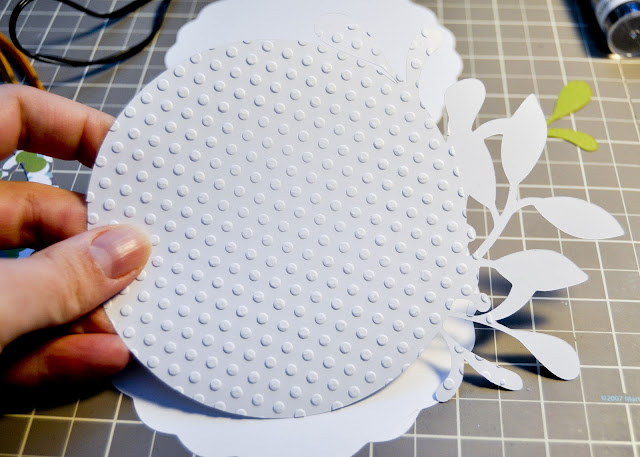
Using my ATG I stuck this layer onto my card base.  Then using cats eye ink I inked the edges of the card in a dark blue.
Then it was time to stick those pretty glitter leaves down, I swiped some atg glue on the 'base leaves' and I gently stuck my glittered ones on top.

Once I had those positioned correctly it was time to put my pattern paper cut out on.  Before I actually stuck this cut onto the base of my card I took this time to put my birdie on.  I used Scotch quick dry again and that stuff really does dry fast!

Now for this layer I really wanted it to stick out so I used a whole bunch of pop dots...... here, there, everywhere :)  Then peel off the backings and turn it over and carefully line it up with the scallops and gently push it down.
Then I grabbed my glittered blue 'hello' which I forgot to take a pic of for some reason :( and found a place where I liked it best stuck it onto the top of the card. Like so....


I still found the card a bit blah, can you believe that even with all the glitter?  So I dug out my dollar store gem stone stash and found some gems that matched my colour scheme and alternated the colours around the scallops.  The blue gem for the birds eye is an I-rock gem and I used my I-rock to set that one on all the micro beads.  It's still holding up great :)

And this is what all that hard work and layering accomplished:


I hope you enjoyed my Hello Birdie card and tutorial today :)
If you would like to see more projects made using my gypsy click on the image below to take you directly to my blog.


See you soon!!!
xoxoxoxo  Magoo

March 22, 2011

Baby Love Box

Hi everyone, this is NurseViper from ScrappyRN

I am making for you a wonderful gift or home decor item for yourself.

How many of you love the new trend of shadow boxes or painters trays?  Sometimes finding them can be hard, other times trying to fit what you want in them can be difficult due to the pre-made sizes of the boxes, and then of course you have the cost.  The following item that I have made is one that I think a parent would love to put in a nursery, but what do you do once the child is a little older?  Put it in a box and store it?  For how long?  You don't want to throw it away because of the cost but it just doesn't fit in a childs room any longer.
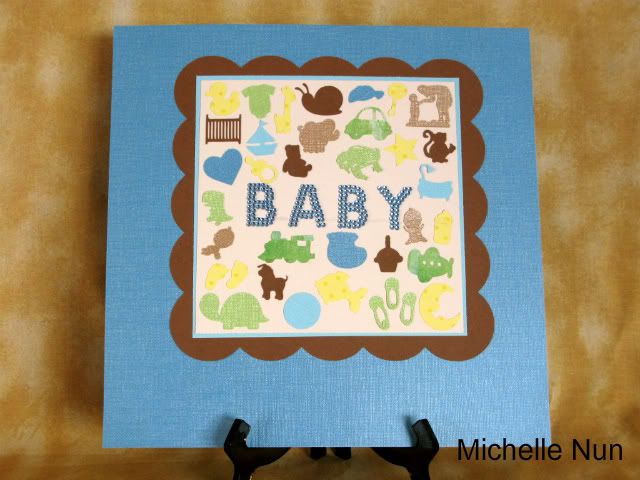
Problem solved!!!!!!!!!!!!!  An awesomely cute nursery item, low cost (total supplies $3.50) and very lightweight so you have no fears of hanging it above a crib, because if it falls it will not injure an infant.


Now what makes this so cheap?  it is made entirely of paper and foam board that is 2 large sheets for a dollar.

Start by deciding what Cricut cuts you want in the box, the lay it out on your Gypsy or DS and getting a rough measurement of the size box you will need.  Cut the bottom and sides from foam board.


I cut mine at 9x20 and 1 inch for the sides.  Glue together with a strong glue, Beacon's 3n1 works great as it is very strong but does not eat the exposed foam.

Then you will need to pick out papers for your background and cuts.  Make and assemble all your Cricut cuts, mine  were all from the BABY STEPS cartridge and almost all were cut at 3 inches to keep it simple.  The banner is cut from MS All Occassions cart at 1 inch.  Once you have them all cut, you can layout them out for placement and cut background papers to size


you will notice that the background papers do not line up touching, this was because I had intended to add foam pieces as dividers in the sections (but one lovely child decided to grab the last of my foam board and make drumsticks out of them) not to be doomed though I came up with another idea.


I cut a piece of heavy cardstock, at 1 1/4 inch wide, and scored at 1 inch the placed alternating cuts,  I used this to slide under the background pieces and adhere to the foam board and then adhered the background paper in place starting with the 3 horizontal lines, then moved onto to placing the smaller ones between the vertical openings.  Finally placing the cuts in with large glue dots.


Finally finishing it off by cutting strips of coordinating colorstock at 2.25 inches and scoring at 1 inch, 1.25 inch and 1.5 inch to cover the rough edges of the side walls.


Then I added a few ribbons at the top, some cute buttons on the bottom corners to cover where the corners were a bit "messy" looking.


You can see in this picture how light it is as it is just sitting on top of this picture frame, and in the second picture it is holding (after 4 days so far) by just two glue dots


You will notice the large empty box in the lower left, this will be used for a banner with the birthdate, once we are SURE of that date.


March 15, 2011

Baby Album

Hi
This is Michelle from http://www.scrapngrow.com/

My fiancee's brother and his wife just had a baby boy this past week and beforehand found out that they were having a boy.  My fiancee and I decided that since she has admired my scrapbooks that to make her one would be a nice gift. OMG it was a lot of work. It took me 2 months 4 days a week -  as this project was especially difficult for me as I have very little experience with anything baby ( My kids have 4 furry legs).

Here are some pictures


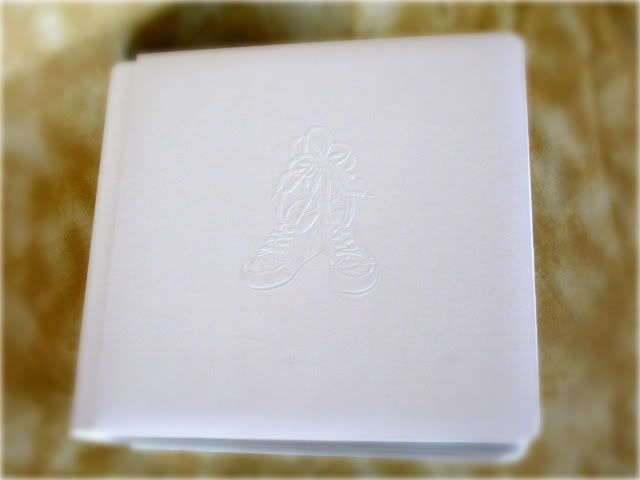
Embossed Baby Album Cover

Album is Creative Memories


Baby Introduction

Inspiration for this page came from the newly released Cricut magazine

Cartridges Used: A Child's Year, Animal Kingdom, Camp Out, Christmas, Create A Critter, Doodlecharms,

Everyday Paper Dolls, George and Basic Shapes, Martha Stewart All Occasions, My Community, New

Arrival, Simply Charmed, Straight From the Nest, and Sugar and Spice


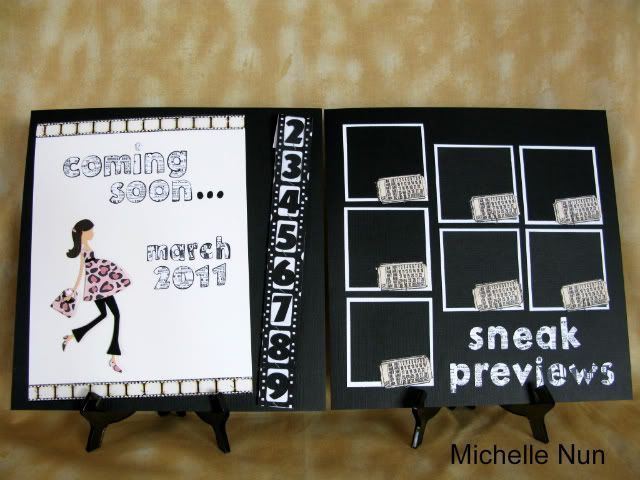
Coming Soon


Note: The filmstrip is 9 spaces long, but like a ticket roll, the number one is rolled under.

Cartridges Used: Forever Young, Mickey Font, New Arrival

Other Supplies: Ranger Glossy Paper, Tim Holtz Filmstrip Ribbon, Tim Holtz Ticket Die and Tim Holtz

stamps, Tim Holtz Mini Paper Clips, Tim Holtz Tiny Attacher, Liquid Pearls, Stickles, and Bling from stash
 

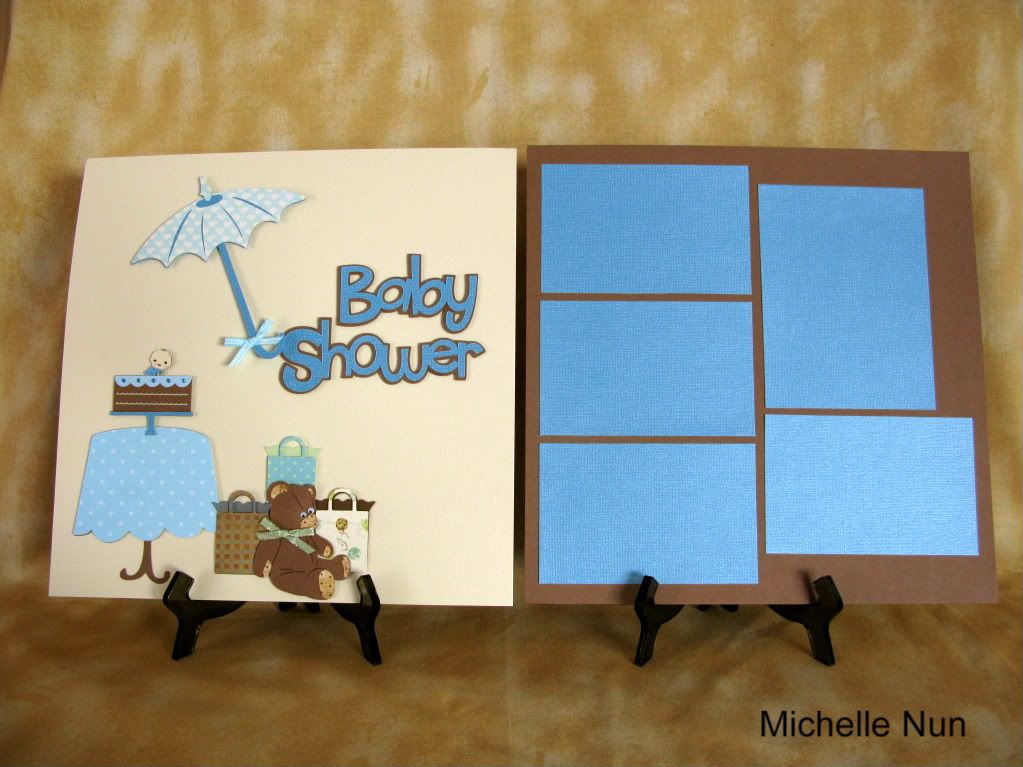
Baby Shower

Cartridges Used: Baby Steps, Birthday Cakes, Christmas, Create A Critter, Cuttin' Up, Kate's ABC's, and

Straight From the Nest


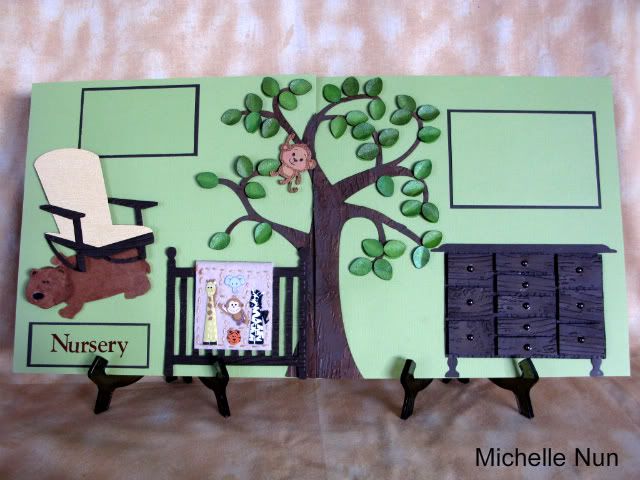
The Nursery

Cartridges Used: Animal Kingdom, Bloom, Calligraphy Collection, Create a Critter, Everyday Paper Dolls,

George and Basic Shapes, Life is a Beach, and Sentimentals

Other Supplies: Sparkly Fluff, Enamel Accents, Paper Trey Ink felt, Tim Holtz Woodgrain embossing

folder, Animal stickers from Michael's, Perfect Pearls Mist, Tim Holtz Shabby Shutters and Peeled Paint

Distress Inks, Pearls from Archiver's, and DMC embroidery Floss


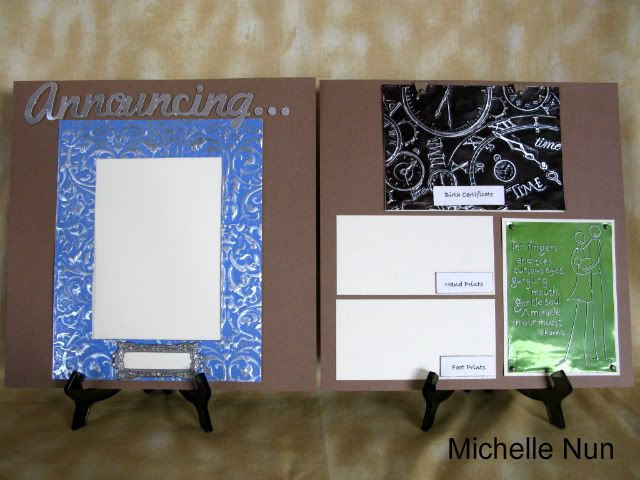
Announcing...

Cartridges Used: Billionaire

Other Supplies: Ten Seconds Studio Metal and Molds, Our Baby embossing folder, Tim Holtz long

fasteners, and Teresa Collins Bling frame


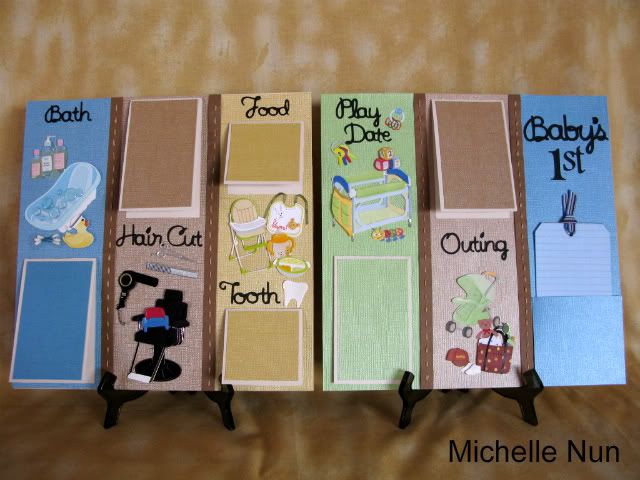
Baby's 1st's

Cartridges Used: B is for Boy, Baby Steps, and Joys of the Season

Other Supplies: Jolee's stickers, Studio 490 stamp, Glossy Accents, and Sew Easy tool with DMC

embroidery floss.


Halloween

Cartridges Used: Happy Hauntings and Mini Monsters

Other Supplies: Sizzix Ghost die, Martha Stewart Bat punch, Martha Stewart Grass border punch,

Creative Memories Circle punch, Tim Holtz Mustard Seed Distress Ink and stickles, Tim holtz jump rings,

and wiggly eyes from personal stash


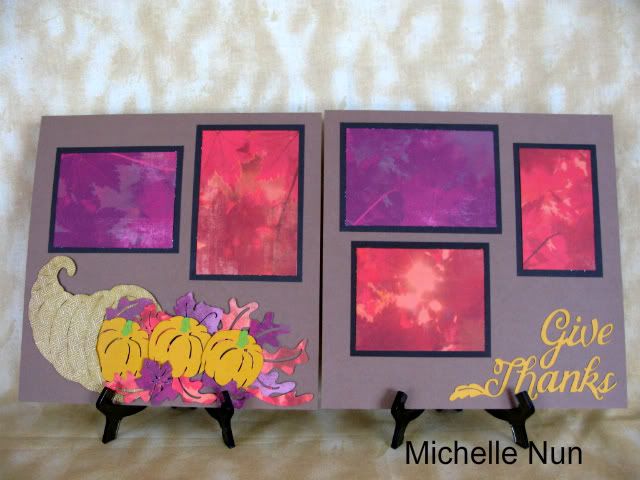
Thanksgiving

Cartridges Used: Paper Doll Dress Up and Thanksgiving


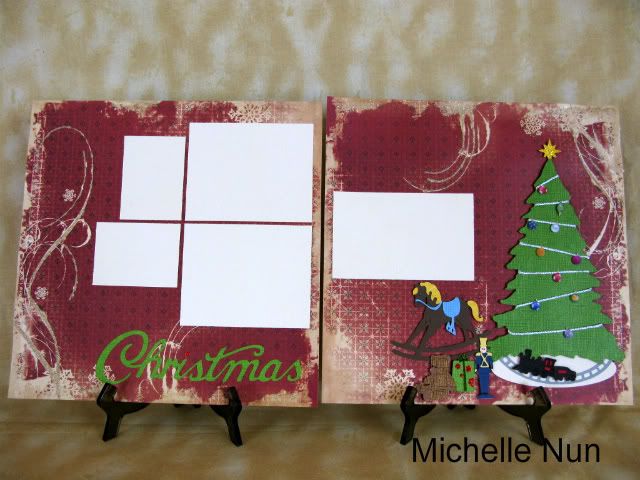
Christmas


Cartridges Used: Birthday Bash, Christmas, and Joys of the Season

Other Supplies: Creative Memories ornament stickers, silver cording, and Tim Holtz Distress stickles
 

Happy First Birthday

Cartridges Used: A Child's Year and Birthday Bash

Other Supplies: Studio 490 stamp, Sparkly Fluff, Tim Holtz Distress Stickles, Ranger Liquid Pearls, and

DMC embroidery floss


Hope you enjoyed looking at the album. Thank you