Knowing is not enough; we must apply! - Johann Wolfgang Von Goethe

Welcome & Copyright & Disclaimer

Welcome to Tuesday Treats. Hope you have a pleasant journey browsing and getting inspired by the projects you find here. We appreciate and treasure your comments so please leave us some blog love and comments. But before you start your journey here just a small note . Do please read and then you can continue on. Copyright: This blog has a many designers showcasing their projects. Please look up their individual site to check their copyrights for any infringements. My files & projects are also all copyrighted. They can be used as inspiration and for personal gifts only but cannot be used in classes, in magazines or for contests. Please look in the side bar for more details on the copyright. Disclaimer: The designer's designs belong to them and them only & not to TuesdayTreat and The TuesdayTreats will not be responsible or liable in any way for any results or consequences from those designs.

May 31, 2011

It's Tuesday - A simple versatile card using the Cricut Imagine.

Hello everyone!  I'm Kris and I'm happy to be joining you on this wonderful Tuesday.  I have to say I am a proud owner of the Cricut Imagine since launch.  I have a new appreciation for this phenomenal machine every time I use it.

I recently purchased all three Snapshot cartridges and they are awesome!  For this card I'm using the Nature cartridge.  It has some fantastic images on it!

This card is pretty generic and you can use almost any sentiment on it from sympathy, thinking of you, birthday, mother's day, and more.

Let's get started!

To make this card you will need:

  • Paper - White,  light Pink, Pattern paper printed from Lori’s Garden (page 42 left pattern) and Snapshot – Nature Imagine cartridges wild flowers (page 9)
  • Punches - Martha Stewart Monarch Butterfly, Stampin’ Up – Word Window Punch & Modern Label Punch
  • Ink - Tim Holtz Distress Ink – Worn Lipstick
  • Tim Holtz Damask embossing Folder
  • Stampin’ Up – Teeny Tiny Wishes Stamp Set
  • Seam Binding in Light Blue
  • WR Memory Keepers Corner Rounder
  • Pop Dots
  • Glue Dots
  • Tape Adhesive
  • Cuttlebug, Sizzix Big Shot, Vagabond, or other embossing machine

 To get started, print and cut your pattern paper on your Cricut Imagine.  I used the proportional rectangles found in the stock images on your Imagine.  Select the 5:7, set the size to 5.  This will give you a 5 x 7 finished rectangle.  Flood fill this with the image on page 9 of the Snapshot:Nature cartridge.  You will be cutting this image down to it's final size of 3" x 4".
[If you don't understand the proportional rectangles or how to use them, I have explained them in detail on my blog.  Click here to go directly to the post.]
Insert the Lori's Garden cartridge and select the 2:3 rectangle on the stock images.  Set the size to 2 and flood fill with the image on page 42, left hand side.  This will be used for the Butterfly and Sentiment.
Trim the flower pattern paper to it's final size of 3" x 4".  You can use this size image to make 2 cards.  I used the left side of the image for my card.  Round the corners with the 1/4" side of the corner rounder. 
Cut a piece of light pink paper 3 1/8" x 4 1/8" and round the corners using the 1/4" side of the corner rounder.  Adhere the pattern paper to the pink and set aside.

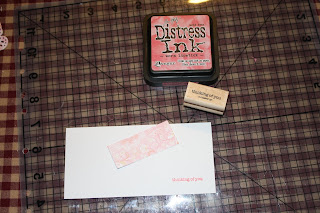
Stamp your sentiment in Worn Lipstick and punch out using the word window punch. 


Adhere this piece to your pattern paper first


Then punch out with the modern label punch.
This way you aren't fighting to get that little piece of paper perfectly centered on the modern label!
Add pearls to the ends.


Punch the butterfly from the pattern paper from Lori's Garden.


Using the Tim Holtz Damask embossing folder, emboss the front of the card base.


 Everything is ready for assembly.

Adhere the flower pattern paper to the top center of the card. 
You want this towards the top so the sentiment fits below.


Roll a glue dot to form a barrel shape and apply to the body only of the butterfly. 
Adhere to the top right corner of the flower image and carefully bend the wings to add dimension.

Add seam binding to the fold side of the card and tie a bow at the lower edge of the card.
Add the sentiment using pop dots below the flower image.


The finished project.  These are very easy to do and take almost no time to complete.  

Hope you enjoyed!

May 24, 2011

You're my Sonshine

Good Morning!
This is Pam today with a layout.
I have recently started liking layouts and for the very first time decided to make my own sketch and play. I have never followed a sketch before in all the 4 - 6 layouts I made and just went as my brain dictated. But I decided that this time I would make a sketch to follow.  I did change many elements but for the most part stuck to it. I am quite happy with the way the sketch and the layout turned out.
Here's a simple sketch I made

And the layout


I have used cartridge baby steps and the title is from Calligraphy collections and Plantin school book. Oval is from George and the labels are  from Lacey labels lite. The paper ribbon is from MS elegant cake welded repeatedly.  The pattern paper on left is from K&Company and the right one - the blue dotted one is from my mind's eye.It is so shiny and lovely! The solid papers - yellow, orange and blue are from DCWV and the green bits are from pack papers I got from Michaels (it was all pastel shades cut in different sizes and stacked up for 3 dollars)
Now I felt the embellishments - babies and the bowl cup and even the title was too small to cut properly as title was about 0.8 - 0.9 inches.  Even though the baby is big the layers was too small to piece. So I wanted to use markers and color them in. So I added the images for marker on one page in the Gypsy and in the 2nd page I added the cutting part. In case of baby- I added the image and used hide and contour to hide the cheeks. In case of cups and bowl I added all layers as a group and then used hide and contour to get rid of portions I didn't need and then placed everything one on top of another to form a whole image. Then on next page I placed the image for cut. Turn on the preview of previous page and you can also note down the x and y and use that  to manually place it after zooming to max. So you first put in marker (remember to protect you drawing area while changing marker and blade) and cut. Then DO NOT UNLOAD but RETURN TO DESIGN. Then change your marker for blade and then go to the next page and cut. Same thing for title though in this case I just placed a label shape on the 2nd page.

Here are some close ups


For the writing for tabs it is my handwriting but I had previously used fontifier and made a font out of my handwriting. I sized it in photoshop to about 10 points instead of 12 as I wanted the sentence to be about 2 1/2 - 3 inches long only . You can of course use word but I like photoshop . I then printed it out and cut it and glued it on to a green cardstock strip and glued it on.  Then I colored the pieces . Assembled the layout and added some brads and used some twine and that's a one page layout done :)
Thank you  for reading. I would love to read your sweet comments so do leave some.
 Have a great week!
Pam