I wanted to share a project using the new Cricut Expression 2. All this week on http://sweetsassydiva.com we are posting projects using all different carts. I chose a newer cartridge that is preloaded on the E2 called Cricut American Alphabet. It is one of 4 that come ready to use.
I used a paper stack my Erin Lee Creative called Cowgirl Up. The cowboy boot paper coordinated well with the boot cut on page 27 of the handbook. And as I hit a really good deal on the paper and received the stacks recently, you know that I just had to play with it!
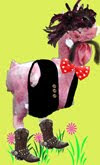
Aren't the boots on the cardstock just so cute!

I did have to flip the icon on the e2 because it just didn't feel right that the boot was facing the opposite direction.
I decided to flip all the cuts and chose 3.5" to cut all the layers out.
What's nice is that as you prepare to cut your paper, there are drop down menus to select your speed, pressure and depth on the E2. I used 80# cardstock so, I selected the option heavy cardstock.

To assemble the pieces, I used my zig pen for the detailed cuts. Plus, liquid adhesives work better with this paper stack.
I decided to do a note card. The base is a finished 4x4". It's easy to make your own card bases. For this one, take a piece if cardstock and cut down to 4x8". Next, take your scoreboard and score at 4".
Next, I decided to do another cut using the same cartridge.

I decided to cut the two shadow pieces as you see above.
The great thing is that I can easily line up my cutting fields by adding carriage returns and brackets that will give spaces.

Then, if you click on the icon on the lower right hand side that looks like a house, it takes you to the next step.
As you see below, I chose two circles. It will now cut each in their corresponding quadrant.

I have a tutorial that goes more in depth on using the E2 along with an informative video at http://sweetsassydiva.com
I used the printed cardstock in the upper left hand side and the scrap piece of dark teal paper in the lower section. You can see it's the same piece that I used for the boot shadow layer.

After the two pieces were cut, I used my ATG scotch tape on the teal layer and placed the scalloped cut on top. It sandwiched the coordinating stash ribbon.

I tied a bow and cut the edges on a diagonal slant.
I adhered the boot to the card and added faux stitching using my white signo pen.

Next, I reached for my stamp stash. I added a sentiment from Unity Stamp Co. "for You".

I hope you enjoyed the E2 project and be sure to check out the rest of the projects that the Sweetsassydiva design team have been working to excite you at http://sweetsassydiva.com
Thank you Pam for allowing me to share my passion with the Tuesday Treats followers!
I hope that you decide to check out my blog and I would love to see you.
SweetSassyDiva
Posted from my iPhone