Knowing is not enough; we must apply! - Johann Wolfgang Von Goethe

Welcome & Copyright & Disclaimer

Welcome to Tuesday Treats. Hope you have a pleasant journey browsing and getting inspired by the projects you find here. We appreciate and treasure your comments so please leave us some blog love and comments. But before you start your journey here just a small note . Do please read and then you can continue on. Copyright: This blog has a many designers showcasing their projects. Please look up their individual site to check their copyrights for any infringements. My files & projects are also all copyrighted. They can be used as inspiration and for personal gifts only but cannot be used in classes, in magazines or for contests. Please look in the side bar for more details on the copyright. Disclaimer: The designer's designs belong to them and them only & not to TuesdayTreat and The TuesdayTreats will not be responsible or liable in any way for any results or consequences from those designs.

April 13, 2010

A "TWEET" Tuesday Treat!

Hello Everyone!


This is Robyn from www.mypinkstamper.com.  I am so excited to be today's Tuesday Treats' Guest Designer.  What an honor to be chosen among such AWESOME talent.  I hope that you all enjoy my SIMPLE project.  That is what My Pink Stamper is known for, CLEAN and SIMPLE!


Okay, I used the Tag on page 90 from Tags, Bags, Boxes and More.  I probably could have just used the mirror image but I wanted to demonstrate how you can weld any image together using your Gypsy.


Here is a quick video I put together showing my TWEET card.  :)


Recipe:


DCWV Flower Shower Spring Stack

Create a Critter & Tags, Bags, Boxes and More Cricut Cartridges

Ribbon & Ink From Stampin' Up!

Thank you so much for letting me be a part of this fun blog today. If you would like to check out some of my other giveaways and Cricut Videos you can click HERE! Don't forget to check out My Pink Stamper Live on April 23rd! I have a Cricut Cake to giveaway!!


April 8, 2010

Love

Good Morning everyone, its Sheila aka SassyLady and I am so excited to do this TBBM page for you today. A TuesdayTreat on Thursday!!! This is a simple page that anyone can do. This is my handsome hubby and I at our daughters wedding 11 years ago!  I used TBBM for the circle and the grunge flowers. The word Love is from the Sweethearts cart and the swirls are from Home Decor.
The background flocked paper is from Me and My Big Ideas... the Sassy Stack (imagine that), the glitter paper is from HL and the black and white patterned papers are from K and C Company from their
Specialty Stack. While at HL I just couldn't help but use a couple of items from the bridal department to complete the look of this page. It's amazing what your can find to put on your pages to dress them up for little of nothing... and I am partial to the pearls.
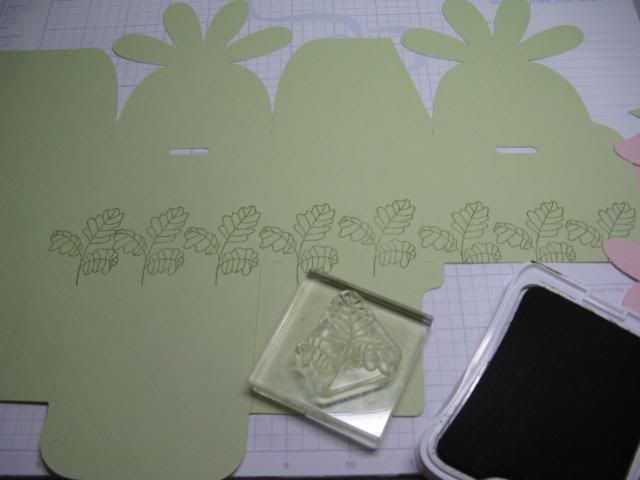
The first thing I do when I make a layout is design it... everything I want on the page appears on my first page of My Gypsy Woman. I then highlight the item, tap add a page and paste so it will be the exact size I want. I use any square box from any cart to show where my photos will appear. I always cut out extra flowers as I always end up with more on the page than my layout shows. After I alter the flower they will be a different size and I don't want to loose the look I started with.
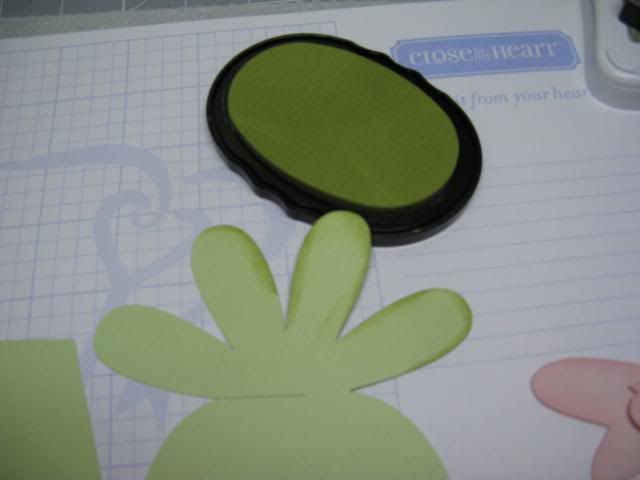
I just love this.... one cut... To get this look I used one TBBM circle and copied it, set one right on the other and then resized till I got the look I liked and welded them together. I then added the swirls and once again welded for that beautiful single cut.
I actually have two pages of flowers but didn't want to bore you with another page of them. I did cut the word Love three times from scrap card stock from the DCWV Taj Mahal stack. This gave it the look of chipboard and more of a presence on the page.
 
Beautiful clean cut, the blade was set at 5, pressure 4 and speed slow. cut 3 times.
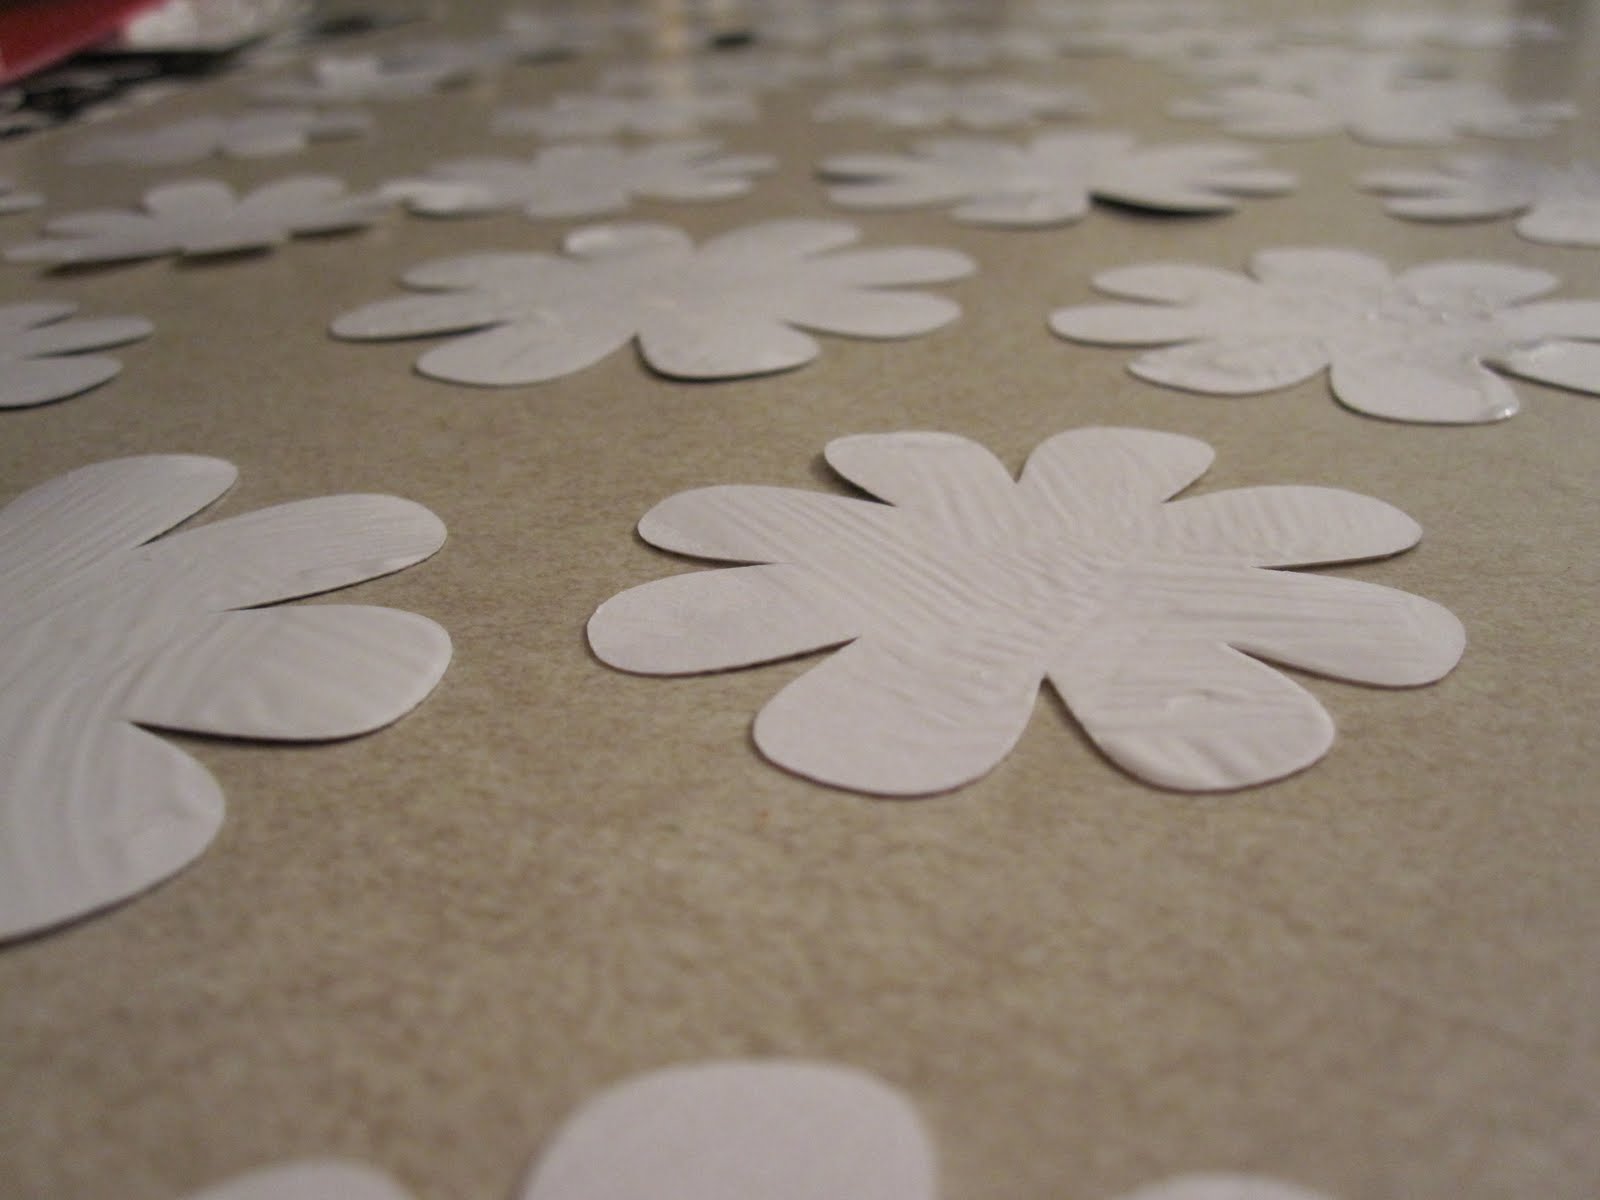
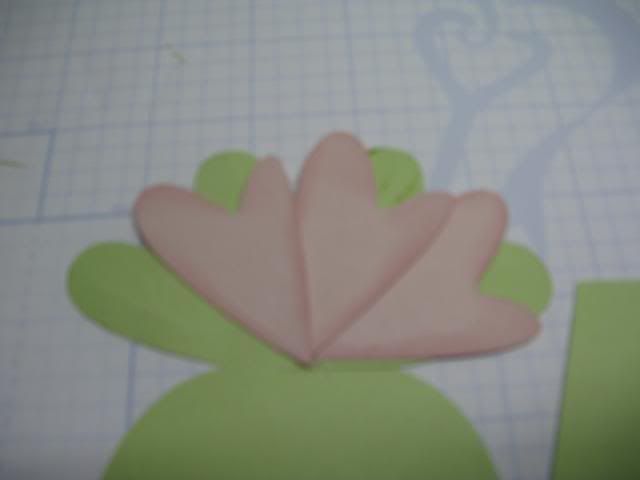
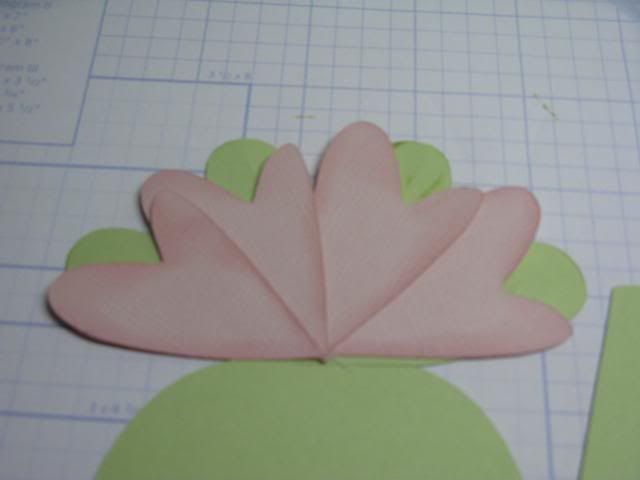
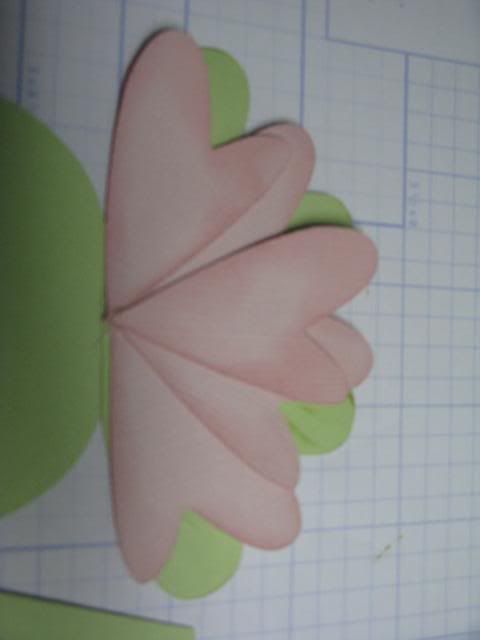
I coated the back of all the flowers with Mod Podge to keep them from ripping with I rolled them with a thin cuticle stick or you could you the base of a slim paint brush. I rolled each petal toward the bottom. Christina from Creations from Christina has directions for this flower on her blog, however this one was totally altered for an eight petal cut.
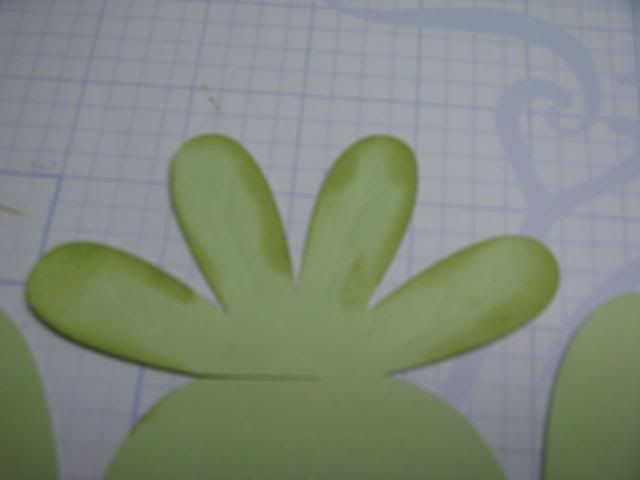
I removed two petals for the center of the flower.
And only 1 for the next.
I glued the two together and then trimed the bottom a little so they would sit flatter.
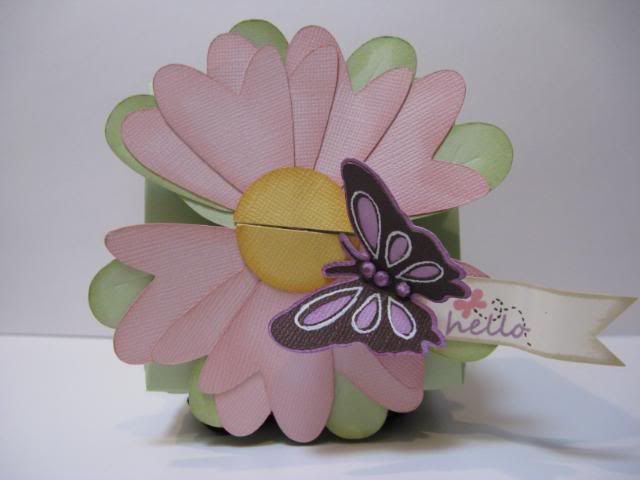
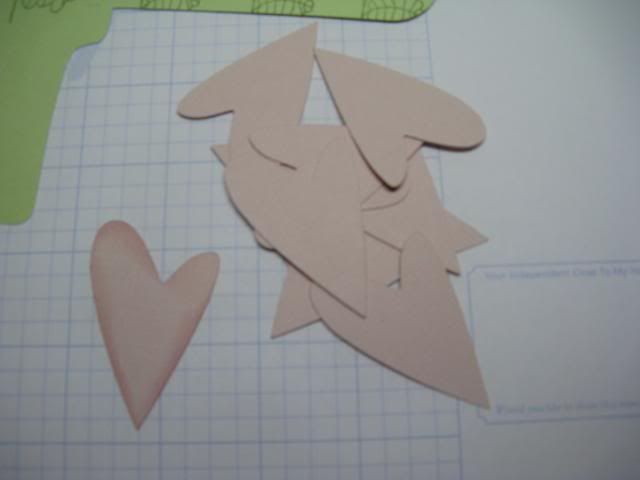
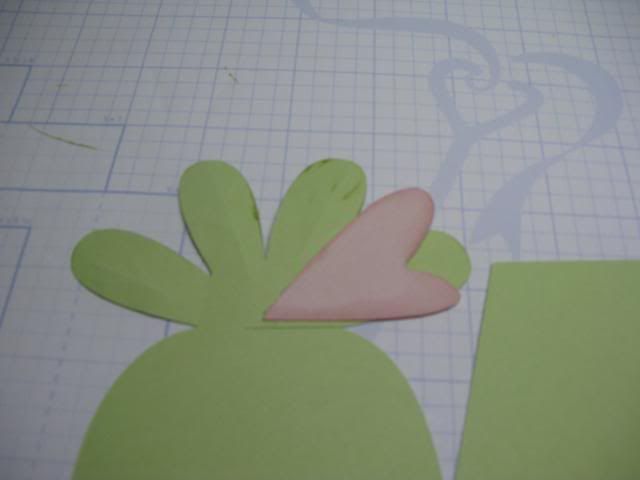
I used a little tiny black flower with a pearl in the center on the inside of the flowers I am making. I place the center into the two bottom pieces that were just glued together just staggered a little. I did all eight flowers not knowing how many I would actually use.... as they are black and white any leftovers can be used on many things.
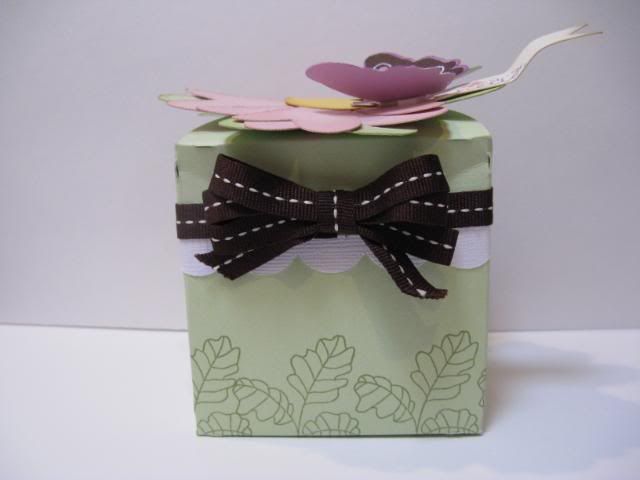
For you Pam.... this is what I do after I get all my cuts ready. I lay all the pieces on the background paper and start placing any embellies on the page too. In this case I chose the charm I wanted, and the pearls... I used two different sizes and styles. After I get the look I want then I adhere all the components.
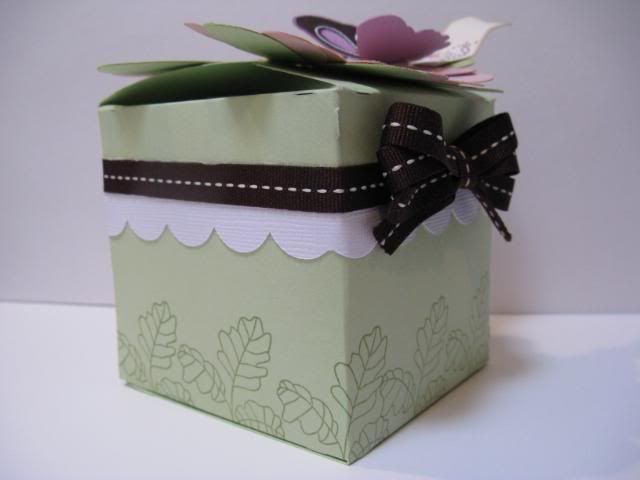
So lets put it together... I used pop dots under the photos so they would be lifted off of the glitter circle to prevent the photo from having a slight crease. The pearls, flowers and charm were adhered by using large glue dots.
I used a silver charm and tied a white ribbon on it and used glue dots to adhere it to the paper, and I used cut portions of the pop dots to lift the word Love.
 
Well I sure hope you liked my little TBBM project today and hope you have fun making one also! Gypsy cut file available at ShesASassyLady.
MyFreeCopyright.com Registered & Protected
Thank You for your sweet~sweet words of encouragement within your comments. I always look forward to reading them as they are so inspiring!
signature

April 6, 2010

Poor Chester.....I'm at it again!

Hi Everyone!!!  Myamagoo here with my take on page 126 of Tags, Bags, Boxes and More.

I've never used this cut before and wasn't really sure what to do with it.  

Then one day in the mail not that long ago - I received a package from our very own SASSYLADY.

Once I opened the package and saw all the colourful feathers in there I KNEW what I was going to do with them :)

I started with designing the cake box using the blackout feature so I would only have score marks (to help guide me on where to fold).  For this project I thought I would keep the project to a 12x12 mat....however you could easily expand this and make it much larger for whatever you need.


Here is the cake box after all scoring and folding has been done.


Next I cut out patterned paper to dress up the cake box a bit.


Then I adhered those pieces to my cake box and drew lines with a white pen to mimc stitching (sadly I don't own a sewing machine).  Then used a pushpin to add some holes to try and make it look more realistic.  Not sure if I accomplished that or not :)


Next it was time to add my favourite red WACKY TACKY TAPE ~ this is the best tape to put boxes together with (in my opinion) as I don't own an ATG gun.


Once the tape was peeled off and I put the box together it was time to do something with the top of the box.  I know that normally people tend to make this cut look just like a piece of cake, but I really wanted to use those feathers that Chester donated (Sassylady I'm calling the SPCA on you - he needs those feathers - look at the vest he has to wear now!).

I digress, I wanted to make a nest and decided to make my own.  I used a branch from the cartridge that started it all (Straight from the Nest) and welded it together to make my nest.


This branch comes with leaves to fit by using the shift feature and voila! Perfect leaves for the branches.  I cut everything out all at one time - so convenient ~ JUST make sure you place your mat in the right DIRECTION....don't ask....lets just say I used more paper than I needed to because I wasn't paying attention lol!

Next I wanted to run the leaves through my cuttlebug - and you got it - I used Swiss Dots again  :) :)


After gluing all the leaves onto the branches, I started adding pop dots to my branches to add some height to the nest that is going to sit on top.

Once I had layered all 4 welded branches onto the top of the box, I got out poor Chester's feathers and slid them in underneath and in between openings in the branches.  Don't they make a lovely home for those Cadbury mini eggs??  (those eggs didn't last long after the photo shoot! yummy!_


Just a couple more pics of Chester's feathers ~ isn't he and SASSYLADY so kind? :) :) :)


Thanks for joining us today at Tuesday Treats (and Thursday too!).  Be sure to come back THIS THURSDAY to be dazzled by our favorite layout design genius SASSYLADY!!!

Gypsy File will be available on my BLOG for downloading - it is a 3 page file and uses Gypsy wanderings for the pieces on the sides of the box, as well as branches from Straight from the Nest.


Gypsy file available for download HERE
I am a MAC user and unable to provide a DS version.


Magoo.


March 29, 2010

A Tasty Tuesday Treat - POPCORN!

Admit it, you've done it, too - bought some craft item in the store because it looked really cool, then stashed it away and never used it. Well, about 6 months ago, I was looking in the paint section at my local craft store and picked up a 6-pack of Tulip Puffy Paint. Now, I was no stranger to puffy paint. I had used it long ago on various projects, but the bottles had long since dried up and been thrown away. So why did I buy more? Simple...the package said "puffs like popcorn." What a fabulous idea that I just HAD to try - but never did. Never, that is, until Pam gave me my Tuesday Treats assignment, and it was the popcorn box from TBBM! I KNEW I bought that puffy paint for a good reason!

My original idea was to make the box and attach "popcorn" all around the edges, then fill the box with movie candy, a package of microwave popcorn, and movie tickets. This idea rattled around in my brain for weeks, but I could never really picture it in a way that I thought I would like. Then I ran across a card online that was basically a sleeve with a slide-out card, and this idea was born! I'm thrilled with the outcome, and I have a few ideas to use with it, though I'm sure some of you will think of others. Please share them if you do so we can post them here as updates.

Here are mine:
"We go together like popcorn and movies." (borrowed this one from a stamp)
"POP on over to the theater for a night at the movies, on me." (enclose movie theater gift card)
"POP on over for a movie night and slumber party."
"Popping up a good time......"
"Popping up good wishes for you...."

So, pop yourself some real popcorn and pull up a seat to watch the videos. Happy crafting. Just try not to get butter on your projects!!

Cartridges: TBBM and either George or Plantin
UPDATED: the zip file will include a cut file for either George or Plantin, along with TBBM
Popcorn Card files for Design Studio
Popcorn Card files for Gypsy

I think someone plopped my whole house down in the middle of the Bermuda Triangle Monday.  It seemed like every electrical thing in my house had issues and did not cooperate, so my videos are not my best.  I had fun  making them anyway, so I hope you enjoy them!


March 23, 2010

Hello, butterfly flower box

Hello, everyone! This is Melanie from Everyday Cricut and Courtney Lane Designs! Today I have a sweet little gift box that I made using my Tags, Bags, Boxes, and More cartridge, my Don Juan cartridge, my Cake Basics cartridge, my Gypsy, and my expression.

This box is on page 120 in your handbook and is a personal favorite. I was so glad that this was the one that Pam and Magoo asked me to do!


The flower petals are hearts from Don Juan.


The butterfly is cut at 1 1/2" from cake basics.


I made ==>this<== cut file using my gypsy and cut out the box(using green cardstock and a 12 x 24" mat), the hearts(using pink cardstock), and the scallop(using white cardstock).

Then I stamped the bottom of the box with a leaf stamp from Papertrey Ink.


Then I inked the edges of the flower with green ink. This will be my leaves portion of the flower.


These are the hearts once they were cut out.


Then I adhered the hearts in the following manner.


I adhered the scalloped border. Then I scored the box using my scorpal. Using the cut tick marks as my guide.

Then I cut out a circle for my flower center with a circle punch and inked the edges. Then cut the flower center in half and adhered it to my project.


I added ribbon and a bow.


Then added my butterfly that I cut with the *New* Cake Basics cartridge at 1 1/2" with a small sentiment banner.


VOILA! Now you have a pretty little box that is perfect for any Mother's Day, birthday, or just because gift.


Thank you so much for stopping by today and checking out my creation. Please feel free to stop by one of my other blogs. As a matter of fact on my own blog this week I am giving away several prizes. I am also making cards all week with the newly released cartridges. Click ==>here<== to check it out.

Have a wonderful day!