Knowing is not enough; we must apply! - Johann Wolfgang Von Goethe

Welcome & Copyright & Disclaimer

Welcome to Tuesday Treats. Hope you have a pleasant journey browsing and getting inspired by the projects you find here. We appreciate and treasure your comments so please leave us some blog love and comments. But before you start your journey here just a small note . Do please read and then you can continue on. Copyright: This blog has a many designers showcasing their projects. Please look up their individual site to check their copyrights for any infringements. My files & projects are also all copyrighted. They can be used as inspiration and for personal gifts only but cannot be used in classes, in magazines or for contests. Please look in the side bar for more details on the copyright. Disclaimer: The designer's designs belong to them and them only & not to TuesdayTreat and The TuesdayTreats will not be responsible or liable in any way for any results or consequences from those designs.
Showing posts with label gypsy. Show all posts

October 26, 2010

Two Page Layouts with a Single Mat

Hi Everyone! It's Ohhh Snap with my first Guest Designer post here at Tuesday Treats. When the gypsy first launched every bit of the image had to be on the mat or nothing would cut at all. Thankfully that has changed! The large background mat is made with two 12 x 12 inch sheets placed side by side on a 12 x 24 inch mat using the 10th image  from Create A Critter with the Phrase feature with the size set at 19.54" height. The height for the smaller mat is set at 10.54". The apple and tree are also from Create A Critter.

The font is from Cindy Loo. I attached the negative cut to the right hand page with some painters tape on the left side. I used it to place the letters on the page. Leaving it unattached on the right allowed me to open it and make sure I had only glued the letters to the page. I used the journal mat to make a pocket for more journaling. The paperclip is from Fabulous Finds and the middle and top of the paperclip is glued to the extra journaling note. Most of the paper comes from the August Club Ruby Designers kit featuring Sassafras Lass.

August 19, 2010

Life is a Beach Inspired Project

Hi Everyone!  It’s Wini from LooneyBugDesigns here with your inspiration for the day.
Orchid 7 
As much as I love this months cartridge Life is a Beach (LIAB), for some reason I do not own it yet.  Even though it is on my list of cartridges to get, there are others that I want more so I decided not to go out and get it right now.  Instead I turned on my Gypsy and started looking over the images on LIAB for inspiration.  I loved the Orchid Image and decided I would use that as my inspiration.
Next I needed to pick an Orchid type flower from a cartridge that I do have.  I decided to use 50 States since it has so many different flowers and found one that I liked.  I placed 4 flowers and the matching layer on a mat on my Gypsy and used my favorite feature Hide Contour to erase all the parts I didn’t want.  I LOVE THIS!  Here is a picture of my Gypsy Mat all ready to cut.
Orichid 1
Now why did I use 4 flowers?  Because that is how many fit on the paper that I was planning on using.  No other reason then that.  I cut them out of white paper so that I could color them with my Copics any color I wanted.  I love to start with a blank canvas.
Orchid 2
I airbrushed the Leaf on all 4 of the bottom layers (I only ended up using 2 of the bottom layers but I colored all I had in case I made a mistake – and besides it is so fun to airbrush! I ended up using 3 colors of green and a hint of pink on the leaves.
Orchid 3
Next it was time to color the flower layers.  I airbrushed the tops and backs of all the flower layers so that I could curl them up and add lots of dimension to the flower.  The flowers have 3 colors of violet, some pink and on the top sides (sorry didn’t get a picture of that) some yellow in the center.  I shaded them lightest in the middle and darkest along the outside edges – because that is the way I thought they looked good.
Orchid 4
Next I layered my flower, curling up the edges as I went and added some yellow Flower Soft to the middle because I felt it was too flat.
Orchid 6
My last step before putting my airbrush system away was to color some cream ric-rac to match the flower.  The dimension on this card is perfect and reminds almost more of a Lilly Pad flower then an Orchid but I still like it anyway.
Orchid 8
Remember just because you don’t have a cartridge that someone used on a project doesn’t mean you can’t make something.  I love to improvise and add my own twist to things.  So break out your cartridges and imagine what you can make with them!
Thanks for visiting today and come back Tuesday for another great LIAB Project. 
Wini aka LooneyBug aka PoohBearBaby from the Cricut  & Circle MB’s

July 22, 2010

House Swarming!


Hello!  What's the buzz? :)  My name is Michele aka Dancingarden on the cricut messageboard.

So my craft table is trashed, and this project is why. :)
This month the focus is on the Sentimentals cartridge. I thought at first I'd do a scrapbook page, as that is my main choice of projects, but I kept looking at this beehive and bee and couldn't come up with a page idea, but I did come up with a gift box idea.

The box is my 6 sided iris-lidded box that I designed last winter on my Gypsy, and offered up in this post on my blog. The downloadable gypsy file for the box is on that post as well as instructions for assembly of the box; so I won't go into detail about making the box base.  I love this box even though it isn't perfect, and I'm glad I'd created it because a hexagon box was perfect for a bee themed project. :)

So first I cut my box out in brown cardstock. (all cardstock and printed cardstock for this project is DCWV)
I apologize for the quality of the pictures of my gypsy screen. This is a view of the filigree cut that is layered over the box. It's actually the beehive filigree layer welded together a few times with another little scroll-y thing to fill in the spaces. Here's what it looks like cut out.
I ran the filigree through my 5" xyron and adhered it to the box. You can see the beehive shape a lot better below. On the gypsy, the filigree runs off the page. I did that ntentionally; partly because I had trouble seeing the box edge through the filigree layer to see how close to the edge I was. And partly because I was lazy and figured it would be easy to just snip off the excess filigree, which I did. You'll notice I did not allow the filigree to run over the tab that is used to adhere the box together.
Once the filigree was attached, I assembled the box as directed on my blog's box post. As I mentioned in that post, you have the option of the top closing with the iris concaved or with it sticking up. For my beehive box, I chose the top sticking up.
I created a small shaped card from the beehive on my gypsy. It is attached with tiny rectangles, and one beehive is flipped so that the front and back will match when they are folded together. Here's the gypsy screen of the little card.
After cutting out the card, I decided to try something I hadn't done before. Some time ago I had bought one of those mini marker holders and a marker set but I hadn't used them yet. I took the card off and flipped it white side up on the mat. Then on my gypsy I wrote out a sentiment message for the inside of the card, and had my cricut write the message with the mini marker. It worked okay. My positioning of the card wasn't quite exact but it was still okay. I do think I'd rather have the gel pen holder and the gel pens though. Here's the sentiment on my G:
You can see the inside of the card below.
After assembling the card and bee layers, I stickled them all (filigree only) with Cinnamon Stickles. Once they were dry, I wound some craft wire into springs and attached them to the backs of the bees and the back of the card.
I tied the card onto the box with ribbon, and I'm done!

This box is perfect for a candle or other small gift. I plan to buy a beeswax candle to go in the box. :)

Please visit this post on my blog to download JUST the box cut file and view assembly instructions.

Or, please go to this link to download the entire cut file for this project: box, bees, card and all.

Thank you for looking and I hope you enjoyed seeing this project!

Michele (aka dancingarden)

July 7, 2010

Heritage Charms


Hi everyone, Lori (the Cricut Lady) here. I was assigned Heritage. Honestly, I would say this is my least favorite cartridge. But this just proves you can use all of your cartridges for something.
I made charms. Wine charms, gypsy stylus charms, book marker charms, bracelet charms. You name it there are really alot of uses for charms.
The Steps:
1) Select you design. I used the silhouettes because I thought the would be good for wine charms.


2) Place your shrinky dink material rough side down on your mat.


3) cut your design. Make sure to use multi cut as it is a thicker material 2 works 3 is better


4) punch a hole larger than you would like your final hole as it will shrink with the plastic


5) Draw a design or write a name on the rough side of the shape (Names need to be written backwards)


6) On a Baking sheet place a piece of aluminum foil


7)with a Popsicle stick (yes, these things can be used for anything) I held down a tiny corner and heated with my heat gun (embossing heat gun)


8) Kinda press down while still hot if it is not completely flat


9) Put a jump ring or a split ring into the hole and run ribbon, wire, twine etc.. through the jump ring.


10) place the piece around your favorite stemmed glass (This is the only stemmed glass in my house, but it is so cute. I love it


11) enjoy your work.

Hope you come up with some uses for this.
Keep creating!!
Lori

June 16, 2010

Those Wonderful Special Features!!!

Hi there gang! FitterTwit here from FunandmentalChanges.com with a little project journey to share that included one of the newer carts.... Sentimentals!

I got the Sentimentals Cricut cartridge a short while ago and LOVE how versatile this cart is!!! Is it just me, or is Cricut making EVERY cartridge a must have? UGH! Sentimentals is proving to be no different!
*
So I spent about an hour coloring this GORGEOUS Lisa Victoria Dragon image, cut it out with my Cuttlebug and a Spellbinder's Nestibilities die and sat it aside while I figured out what to do with this little gem. A couple of days later Sentimentals arrived in the mail and as I was browsing the idea book, the flower card and matching envelope JUMPED off the page at me. "How PERFECT to go with that cute little dragon I finished just the other day!" Typically, a card that doesn't have patterned paper and ribbon is usually quite boring to me, but this card just seems to work in it's simplicity! The AWESOME dragon and the flower die cut are plenty to give this card a little 'WOW' factor. And let me just add that by using my Gypsy to put this together, it was a ONE CUT job that took 15 minutes to complete. Here's how I did it.... in fact, this is how I do ALL my cards. NO WONDER I didn't do these cards before having my Gypsy... this is SOOOO much easier.
*
And here I am adding my images to my virtual mat on my Gypsy. What you don't see here is that I originally designed on a 12 x 24" mat because my "layers" button on my isn't working (???). The best part, I added my images to my virtual cutting mat while they were still grouped and then ungrouped them to move each image to where I wanted them on my ACTUAL 12 x 12" cutting mat (I touched the silver menu button and selected "change mat size"). Now, the reason these steps are significant is because by adding the card WITH the envelope (grouped together) to your mat BEFORE sizing means that when you do increase the sizes, they will both change proportionately to one another. No muss and no fuss with trying to figure out exactly what size the card needs to be and then figuring out what size the envelope needs to be. EVERY card (this method works great for Wild Cards as well) and every envelope cut perfectly to fit together and you never have to worry about "doing the math". I LOVE it.

*
So here I am laying out my pieces.... PERFECT FIT! Time to connect my Gyspy to the machine and cut. No wasted paper or "trial runs"....those of you who made cards before the existence of Design Studio or the Gyspy know EXACTLY what I'm talking about! LOL!
*
And finally, here is the matching envelope with the card inside... SWEET!!! And now with the hide feature from the last update, I can go in and hide those hash marks that usually show you where to score, but have a tendency (like in the case of this AMAZING card I made a few weeks ago) to "stick out" once you've scored your line. Pam.... I know has and WILL be talking about THAT new and exciting feature! ;)

May 27, 2010

Coupon organizer

Hello everyone! This is TraciVee here from http://neverfullpricescrapbooking.blogspot.com/ . If you are a follower of mine, you might already know that I'm a penny pinching, coupon clipping, money saver. I thought it would be prudent to include my passion for saving money into my project. And so the idea of creating a cute coupon organizer was born....

Here is the 'recipe' :
2 pieces of Tim Holtz grungeboard
1 1/4 in Zutter o-wire
brown acrylic and metallic acrylic paint
10 5/8 in long piece of white elastic
Brenda Walton Brookfield Scrap Pad to go
two large eyelets
9 Prima-type flowers (mine were Paper Studio)
3 brads
adhesive
chalk ink

I first used my Gypsy to cut the rectangles used for the pages. I think I just used a rectangle shape from Plantin Schoolbook but resized it to 10 3/4 in by 8 in. Cut out as many of these as you wish. I like to have a lot of categories to sort my coupons into, so I cut out 10 of these, which will give me 20 pockets!


Here are all the pages after I cut them out. I really like this stack...it's full of homey earth tones-my favorite!


Next, you score each page halfway down the long way.....


...and about 3 5/8 in into the short way.


Then you fold each along the score lines as shown. You're gonna fold the short side up and then fold along the long side so that when you are finished your pockets are on the outside.


Here are all my folders all ready to go....


Next, I punched them all with my Bind it All...what a job that was!


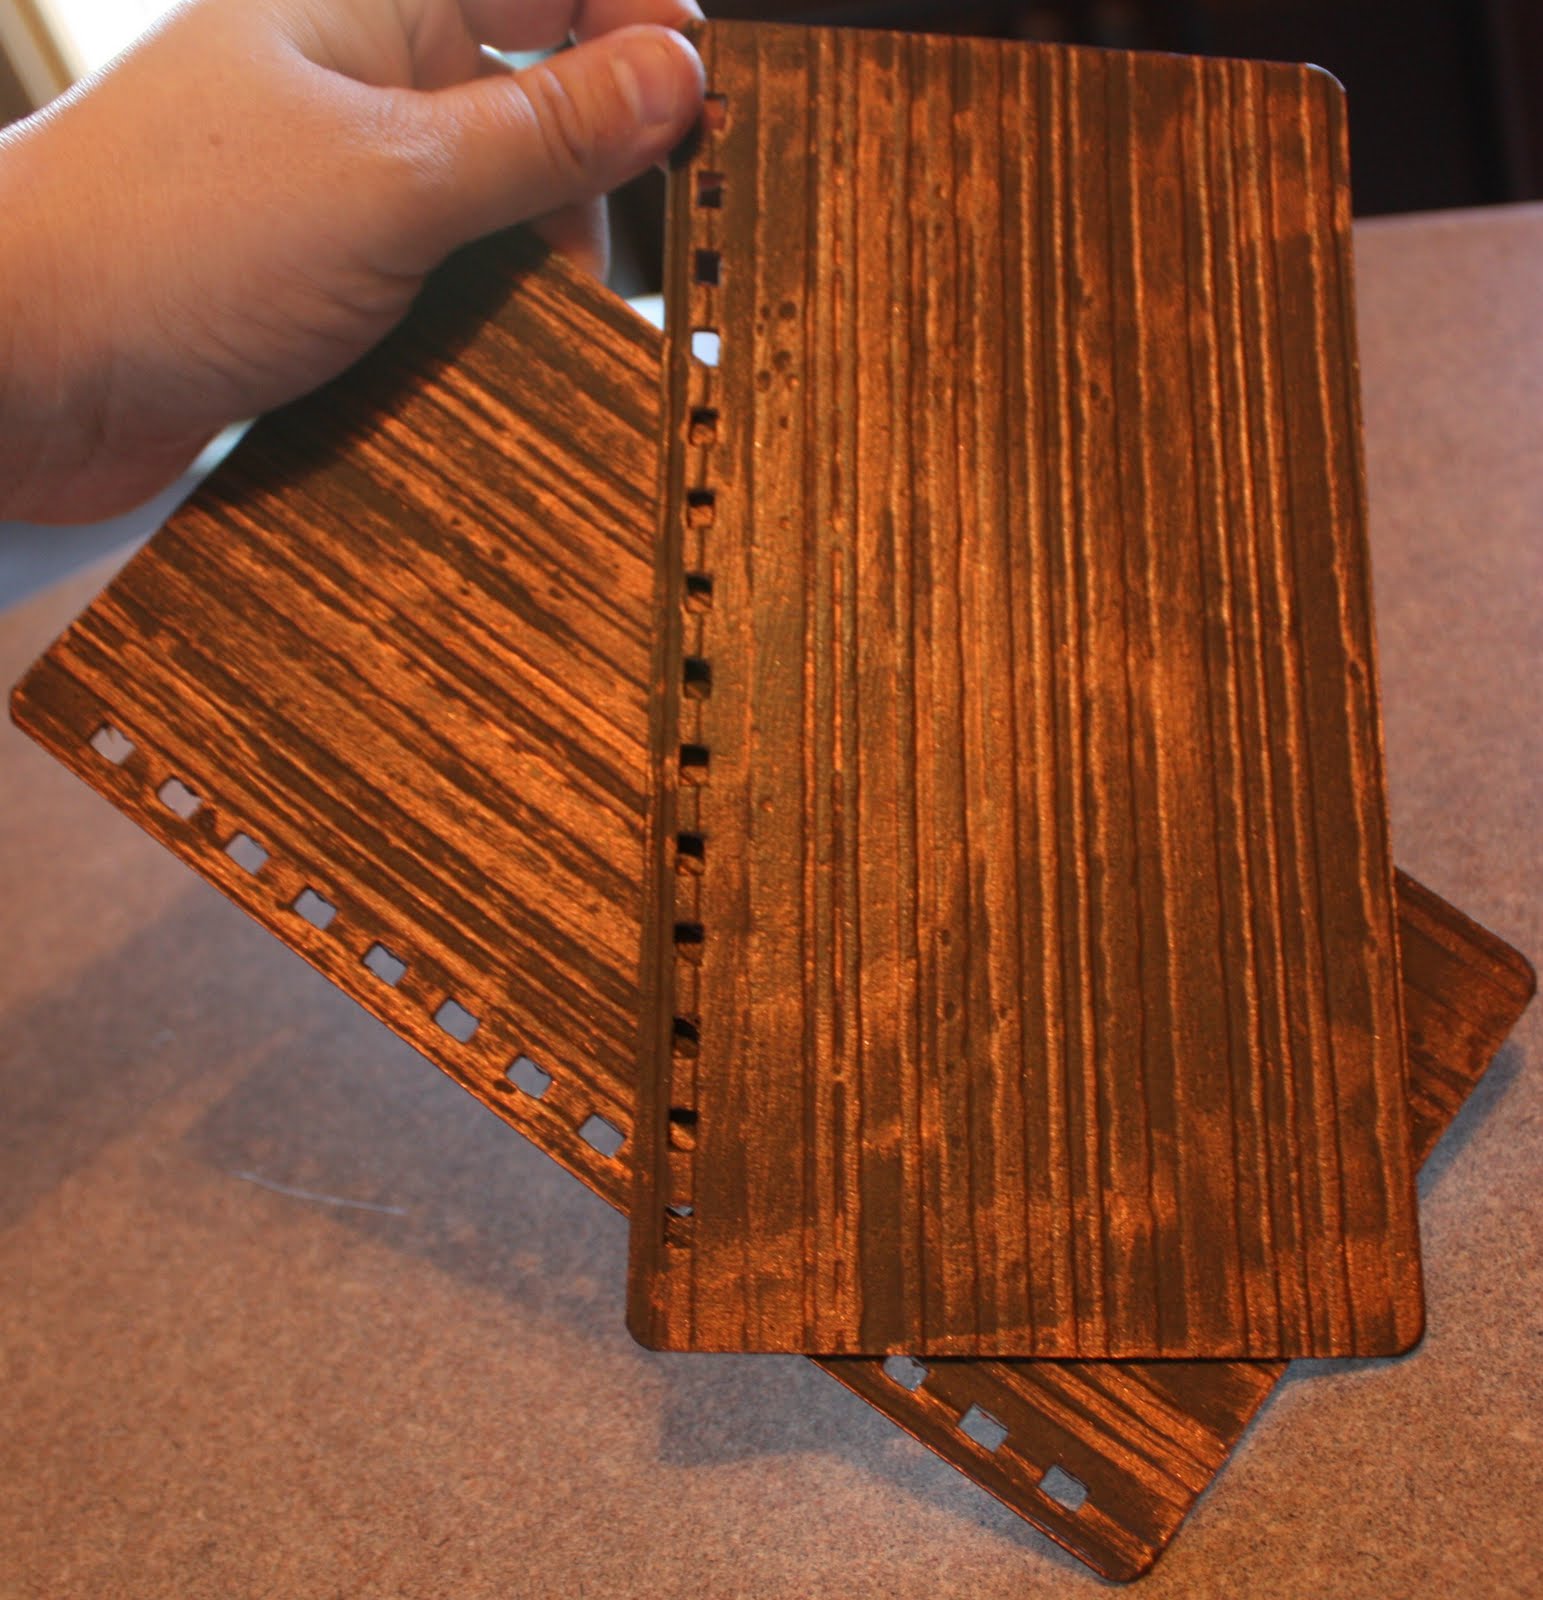
Next, prepare your naked Grungeboard. I cut two pieces at 7 3/4 in by 4 1/8 in. Then I rounded the corners for a more finished look. Next, line up the Grungeboard with one of your coupon folders and punch holes.


Next, I painted my Grungeboard with dark brown acrylic paint.


After that dried, I lightly brushed some copper metallic acrylic paint on top, but wiped it off right away with a paper towel. Some of the copper stays on, but the dark brown still comes through. This technique kind of gives it a rustic kind of look. Very cute!
*Sorry but this photo is not terribly true to life in its color...but you get the idea....*


Next, I used my Gypsy to create the labels for my coupon folders. Cut as many shapes as you need. I cut 20 in cream colored card stock and then cut out another 20 out of coordinating paper in shadow feature.


After cutting them all out, I inked them using chalk ink and an ink blending tool.


Here are the shadows....


Now, I wanted a more finished look so I used my computer to print out my labels. You can just write them in if you don't feel all this is worth it. :)
What I did was print out my labels....


Then I used repositionable adhesive to stick them to the piece of paper that I printed them out on...I used Okie's method of doing this. She has a great video tutorial on how to do this- http://okieladybugsscrapnmore.blogspot.com/search/label/Video%20Tutorial%20-%20Printing%20on%20Cardstock%20shape


After I got them printed out, I adhered them onto the folders and put the whole thing together. Hello Mr. Bind It All!!!


Okay, so after all that I knew I'd need some type of closure so that my coupons don't fly out all over the place. What I did was punch a couple of holes and used an eyelet to hold my elastic in place. Be really careful when placing the elastic when you set your eyelet so that it won't come undone.


I looked high and low for colored elastic, with no luck! ... so I broke down and bought white thinking I could just color it with a marker...and that is just what I ended up having to do!
At this point, I just prettied-up the cover. I punch three holes and added my flowers with a couple of brads. Nice 'n' easy.....


I set my coupon organizer up for the way I shop...I always go around my Super WalMart the same way....Health and Beauty first...then my cleaners...then condiments...and so on and so on...I'm kinda ritualistic when I go grocery shopping, LOL.
I used that idea to order my coupon labels. Toiletries, Cleaners, Condiments, Canned Goods, Pasta/Rice/Boxed Dinners, Baking, Snacks, Beverages, Breakfast &Cereal, Paper & Plastics, Dairy, Frozen Items, Bread/Bakery Items, and Produce.


And-what would you know!- right after I finished binding my coupon organizer they went and remodeled my Super WalMart and now my book is all out of order!!! Doesn't that figure??? lol Oh well....


Oh...and last but not least...my FAVORITE coupon category...


Crafty Coupons---NEVER leave home with out them! :)
I hope you all enjoyed my project. Thanks so much for looking. If you have questions or anything, feel free to stop by my blog and I'll be sure to answer you! Have a great day!