Knowing is not enough; we must apply! - Johann Wolfgang Von Goethe

Welcome & Copyright & Disclaimer

Welcome to Tuesday Treats. Hope you have a pleasant journey browsing and getting inspired by the projects you find here. We appreciate and treasure your comments so please leave us some blog love and comments. But before you start your journey here just a small note . Do please read and then you can continue on. Copyright: This blog has a many designers showcasing their projects. Please look up their individual site to check their copyrights for any infringements. My files & projects are also all copyrighted. They can be used as inspiration and for personal gifts only but cannot be used in classes, in magazines or for contests. Please look in the side bar for more details on the copyright. Disclaimer: The designer's designs belong to them and them only & not to TuesdayTreat and The TuesdayTreats will not be responsible or liable in any way for any results or consequences from those designs.
Showing posts with label Heritage. Show all posts

July 7, 2010

Heritage Charms


Hi everyone, Lori (the Cricut Lady) here. I was assigned Heritage. Honestly, I would say this is my least favorite cartridge. But this just proves you can use all of your cartridges for something.
I made charms. Wine charms, gypsy stylus charms, book marker charms, bracelet charms. You name it there are really alot of uses for charms.
The Steps:
1) Select you design. I used the silhouettes because I thought the would be good for wine charms.


2) Place your shrinky dink material rough side down on your mat.


3) cut your design. Make sure to use multi cut as it is a thicker material 2 works 3 is better


4) punch a hole larger than you would like your final hole as it will shrink with the plastic


5) Draw a design or write a name on the rough side of the shape (Names need to be written backwards)


6) On a Baking sheet place a piece of aluminum foil


7)with a Popsicle stick (yes, these things can be used for anything) I held down a tiny corner and heated with my heat gun (embossing heat gun)


8) Kinda press down while still hot if it is not completely flat


9) Put a jump ring or a split ring into the hole and run ribbon, wire, twine etc.. through the jump ring.


10) place the piece around your favorite stemmed glass (This is the only stemmed glass in my house, but it is so cute. I love it


11) enjoy your work.

Hope you come up with some uses for this.
Keep creating!!
Lori

June 29, 2010

Heritage Silhouette Jewelry

Hi everyone. My name is Yolonda and I am glad to be this weeks guest designer on Tuesday Treats. My name on the message board is Crafty Scentiments. I wanted to make a video of my project, however, after I came back from my vacation I had a bad cold and I literally have had no voice. What little voice I do have sounds terrible, so I thought I would spare you.

This is the first project that I made using this cartridge and it turned out really nice. So nice in fact that I have taken this idea even further and designed some other pieces of jewelry using other cartridges. I will be posting them on my personal blog (http://craftyscentiments.blogspot.com) later this week. For today's project I designed a very simple pair of earrings.

Here is a list of my supplies.
Heritage Cartridge pg. 68 (silhouette 5)
Black Card stock (Recollections)
Scotch Quick Dry Adhesive
Martha Stewart hole punch
Ranger Perfect Pearls Pigment Kit (Jewels)
  • Forever Red
  • Forever Green
  • Forever Blue
  • Forever Violet
Ranger Mini Mister
Needle Nose Pliers
Jump rings
Silver Plated Ear Wires

Although the Gypsy is not really needed for this project, it makes designing projects so much easier. You can really see just how big an image will be. I started by cutting the silhouette at 1.5 inches. I cut 2 layers for each earring. One set I cut in the original orientation, and the other set I reversed the image to cut them out. I used black cardstock for this project so the colors of the Perfect Pearls would really stand out.


Using Scotch Quick Dry Adhesive, I glued the layers of the silhouette together. I used the Martha Stewart punch to punch a hole at the top of the piece.


Before adding the jump rings and ear wires, I colored the pieces. The Perfect Medium that comes in the kit is like an embossing ink. I stamped the entire piece to cover with it with the thick substance.


The powders come in a variety of colors. The powders are very fine and a little goes a long way. I dusted the entire piece randomly with the Perfect Pearls Powders making sure to clean the brush between colors.


To set the powder, you need to lightly mist it. I used the Mini Mister by Ranger to spray a fine mist in the air. Then you sweep the piece across the mist of water. You really need very little water and by sweeping across the mist that is in the air, you won't use too much water. I then attached the silhouette to the ear wire by using a jump ring.


And here is the finished piece. They are very lightweight and really fun to wear.


That's my project. Thanks for taking the time to view it and I hope you enjoyed it. Be sure to leave me a comment. I would love to hear what you think.


June 22, 2010

Heritage Brooch

Hi!  It’s Wini from LooneyBugDesigns.  I am poohbearbaby on the Cricut Message Boards.  I am honored to be your designer for today.  I would love to share my Heritage inspired project with you today.

I have always associated Brooches with Grandmothers.  I don’t know why but just the word Brooch makes me think of my Grandma.  I don’t remember any of my grandmothers wearing a brooch so I am not sure where the association comes from – just my weird way of looking at things.

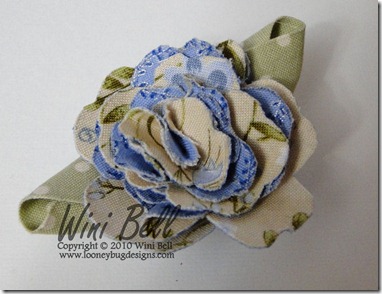
I decided that I wanted to make a brooch for you but I didn’t want it to be made of paper and therefore look off – so I decided to try my hand at cutting fabric with my Cricut.  I had this picture in my head of this flowered brooch that was somewhat old world looking.  Where did the image come from?  Your guess is as good as mine but it was there.   I had never tried anything quite like this but thought I would give it a try.  Here is the brooch I came up with:
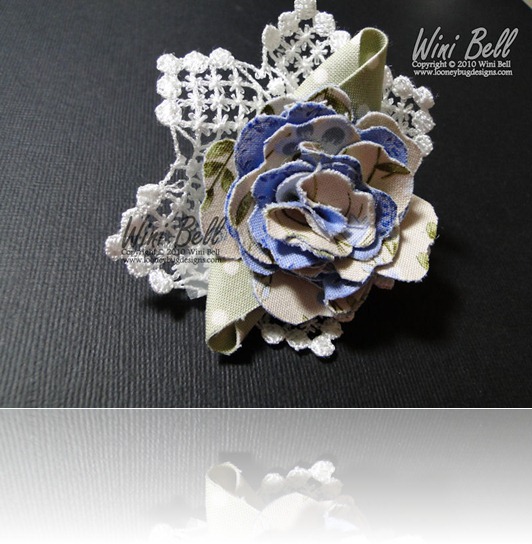
TT Finished Brooch

I started my project by picking out my fabric and trim.  I didn’t know what exactly I was looking for – but I wanted it to look a little vintage (which is typically not my style).  Here are the fabrics that I choose – I LOVE the way they look together.

TT Fabric

I chose two fabrics for my flowers because I wanted them double sided.  So I fused the butterfly and the blue fabrics together to make a single two sided fabric.  I also fused the green dotted fabric to itself to make that two sided (with the same fabric on both sides).  You can’t really tell from the photos but the blue fabric has silver thread in it so it really sparkles in the light.  I thought about tea dying the fabrics and the lace but that was just too vintage for my style – so I left them as they were.
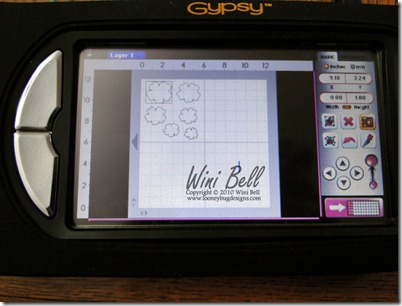
TT Gypsy

Next I set up my file on the gypsy.  I used the blackout feature on the Home Decor Cricut Cartridge to get the flower I wanted.  I turned the real dial size feature on (see the a button is highlighted in yellow) so that I could get the exact size flowers that I wanted.  I then sized the width of my flowers starting with 2.5” and going down in 0.25” increments to 1.25” – 6 flowers in all.  I put my fabric on my stickiest Cricut Mat and away I cut….

Now here are some things to keep in mind when cutting fabric:

  1. Use a new blade
  2. Don’t use thick fabric
  3. Don’t put your images too close together
  4. Don’t cut too fast

Do you know how I know all this?  Yup – I didn’t do any of those things and big surprise, my fabric didn’t cut very well.  I will have to try it again when I get some new blades.  So in the meantime… I cut my file again using some scrap cardstock – traced it onto my remaining fabric and cut them out by hand – UGG – Remind me to ALWAYS HAVE SPARE BLADES ON HAND! I hate to cut by hand – the Cricut has really spoiled me!!  Anyway here are my cut out flowers.
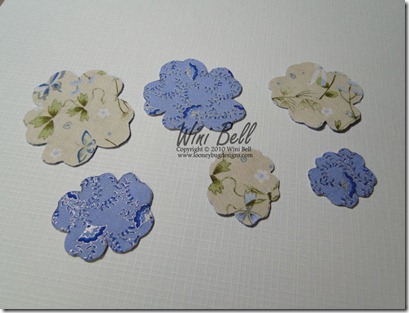
TT Starting Pieces

Starting with the smallest flower – fold your flower almost in half and hot glue the center together (yes I discovered that hot glue works best for this project – who knew?).  Fold the next flower the other direction and glue it to the first section.  Continue until you have just the largest flower left.  I folded this the same way as the previous flower so that the back of my flower would look uniform. I know that I didn’t describe this process very well – If anyone is interested in seeing a video of how I did this just let me know in the comments and I will make one up and get it posted.  Here is my finished flower.

TT Flower Close Up

I then took two strips of the green fabric and folded them over to form leaves.

TT Leaf

I glued the two leaves onto the back of my flower.  I played around with them giving some extra tucks until I had them looking just how I wanted them.  Here is what my flower looked like when I was finished.

TT Messy Back TT Flower w leaves

I wanted to add this really soft ivory lace that found – so I glued that to back of the flower.

TT Adding Lace

I think it really added a lot of charm.  It was just what I was imagining!  I love it when that happens!!!

To finish up my brooch I glued the flower to a chipboard circle and attached a 1” pin backing.

20100621_24

I love this close-up of the brooch – I can’t believe that it turned out so close to the picture I had in my head when I started!
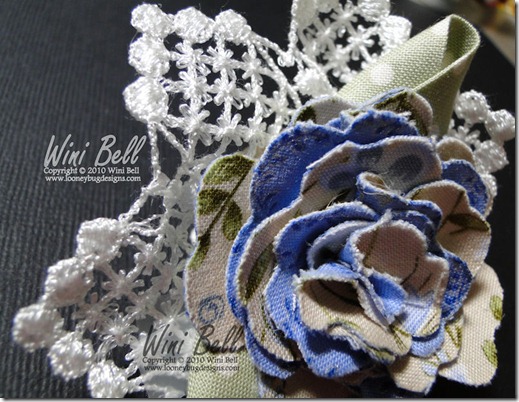
TT Finished Close Up