Knowing is not enough; we must apply! - Johann Wolfgang Von Goethe

Welcome & Copyright & Disclaimer

Welcome to Tuesday Treats. Hope you have a pleasant journey browsing and getting inspired by the projects you find here. We appreciate and treasure your comments so please leave us some blog love and comments. But before you start your journey here just a small note . Do please read and then you can continue on. Copyright: This blog has a many designers showcasing their projects. Please look up their individual site to check their copyrights for any infringements. My files & projects are also all copyrighted. They can be used as inspiration and for personal gifts only but cannot be used in classes, in magazines or for contests. Please look in the side bar for more details on the copyright. Disclaimer: The designer's designs belong to them and them only & not to TuesdayTreat and The TuesdayTreats will not be responsible or liable in any way for any results or consequences from those designs.

March 29, 2010

A Tasty Tuesday Treat - POPCORN!

Admit it, you've done it, too - bought some craft item in the store because it looked really cool, then stashed it away and never used it. Well, about 6 months ago, I was looking in the paint section at my local craft store and picked up a 6-pack of Tulip Puffy Paint. Now, I was no stranger to puffy paint. I had used it long ago on various projects, but the bottles had long since dried up and been thrown away. So why did I buy more? Simple...the package said "puffs like popcorn." What a fabulous idea that I just HAD to try - but never did. Never, that is, until Pam gave me my Tuesday Treats assignment, and it was the popcorn box from TBBM! I KNEW I bought that puffy paint for a good reason!

My original idea was to make the box and attach "popcorn" all around the edges, then fill the box with movie candy, a package of microwave popcorn, and movie tickets. This idea rattled around in my brain for weeks, but I could never really picture it in a way that I thought I would like. Then I ran across a card online that was basically a sleeve with a slide-out card, and this idea was born! I'm thrilled with the outcome, and I have a few ideas to use with it, though I'm sure some of you will think of others. Please share them if you do so we can post them here as updates.

Here are mine:
"We go together like popcorn and movies." (borrowed this one from a stamp)
"POP on over to the theater for a night at the movies, on me." (enclose movie theater gift card)
"POP on over for a movie night and slumber party."
"Popping up a good time......"
"Popping up good wishes for you...."

So, pop yourself some real popcorn and pull up a seat to watch the videos. Happy crafting. Just try not to get butter on your projects!!

Cartridges: TBBM and either George or Plantin
UPDATED: the zip file will include a cut file for either George or Plantin, along with TBBM
Popcorn Card files for Design Studio
Popcorn Card files for Gypsy

I think someone plopped my whole house down in the middle of the Bermuda Triangle Monday.  It seemed like every electrical thing in my house had issues and did not cooperate, so my videos are not my best.  I had fun  making them anyway, so I hope you enjoy them!


March 23, 2010

Hello, butterfly flower box

Hello, everyone! This is Melanie from Everyday Cricut and Courtney Lane Designs! Today I have a sweet little gift box that I made using my Tags, Bags, Boxes, and More cartridge, my Don Juan cartridge, my Cake Basics cartridge, my Gypsy, and my expression.

This box is on page 120 in your handbook and is a personal favorite. I was so glad that this was the one that Pam and Magoo asked me to do!


The flower petals are hearts from Don Juan.


The butterfly is cut at 1 1/2" from cake basics.


I made ==>this<== cut file using my gypsy and cut out the box(using green cardstock and a 12 x 24" mat), the hearts(using pink cardstock), and the scallop(using white cardstock).

Then I stamped the bottom of the box with a leaf stamp from Papertrey Ink.


Then I inked the edges of the flower with green ink. This will be my leaves portion of the flower.


These are the hearts once they were cut out.


Then I adhered the hearts in the following manner.


I adhered the scalloped border. Then I scored the box using my scorpal. Using the cut tick marks as my guide.

Then I cut out a circle for my flower center with a circle punch and inked the edges. Then cut the flower center in half and adhered it to my project.


I added ribbon and a bow.


Then added my butterfly that I cut with the *New* Cake Basics cartridge at 1 1/2" with a small sentiment banner.


VOILA! Now you have a pretty little box that is perfect for any Mother's Day, birthday, or just because gift.


Thank you so much for stopping by today and checking out my creation. Please feel free to stop by one of my other blogs. As a matter of fact on my own blog this week I am giving away several prizes. I am also making cards all week with the newly released cartridges. Click ==>here<== to check it out.

Have a wonderful day!


March 16, 2010

Guest Designer: Tammy - Easter Favor Boxes

Hello Everyone!  This is Tammy from Creative Critters Cricut Club!  (say that three times really fast! lol)  I am so excited to be the guest designer for today and want to share my cute little Easter Favor Boxes!

I was assigned the box on page 119 of the TAGS, BAGS, BOXES & MORE cartridge handbook.  Careful though... if you look at the handbook online at cricut.com... it will be page 69.  I think they may have gotten rid of all the different languages...just my guess.

But, I was excited to get this box as my assignment because I have done many things with it in the past.  Now that I have my gypsy... the sky is the limit!  Take a look...


My cookie on a stick.  The box full of jelly beans is the stand for the cookie (or lollipop).


This box has a window in three sides.  I used my Gypsy to add the scalloped egg (from EASTER 2010 cartridge) as a window for my box.


Here is a video tutorial that will take you through the steps on how to make these yourself.  I used the Gypsy for the taller box, but you could make a standard 9" box with the cricut expression alone.

Part I Steps 1-3


Part II Steps 4-8


The finished product...


The scalloped eggs and bunny are from the EASTER 2010 cartridge.  I am actually Guest Designer at the HALLMARK SCRAPBOOK blog this week and am featuring the EASTER 2010 cartridge all week!  They have some awesome prices on cartridges over there!  You can get the TAGS, BAGS, BOXES & MORE for only $27.99 and the EASTER 2010 is only $18.99!

Hope you like them! 


In honor of being Guest Designer here, I am giving away a TAGS, BAGS, BOXES & MORE cartridge and because I am Guest Designer at Hallmark Scrapbook... I am giving away an EASTER 2010 cartridge this week!  All you have to do is leave a comment either here or at http://www.cricutcritters.com/ or at HallmarkLadybugs or at all three places!  Drawing will be on Monday, Mar 22nd.

Thanks for stopping by and feel free to come visit me sometime!  Thanks Pam & MyaMagoo, for inviting me over!  I had a great time!

Craftingly yours,

Tammy

March 9, 2010

Walking Barefoot..

on the freshly sprung grass in spring time.....
What a wonderful feeling and some of my family members had this pleasure forcibly thrust upon them when I raided their shoe closet - :) for this episode of Tuesday Treats.
It wasn't that bad ...as I just raided their shoe polish , and left them with their shoes. The laces - thought it would be better all around just buying them ..
What did I need all this for??
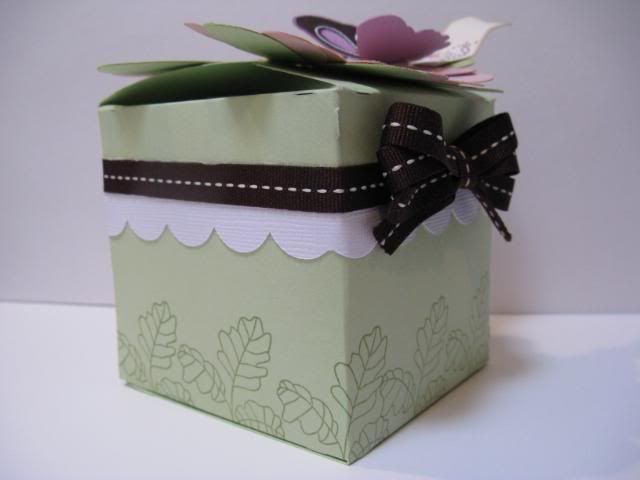
For one of my purse this week

from Tags Boxes, Bags and More Cartridge - pg 118 button 37 on the overlay.   

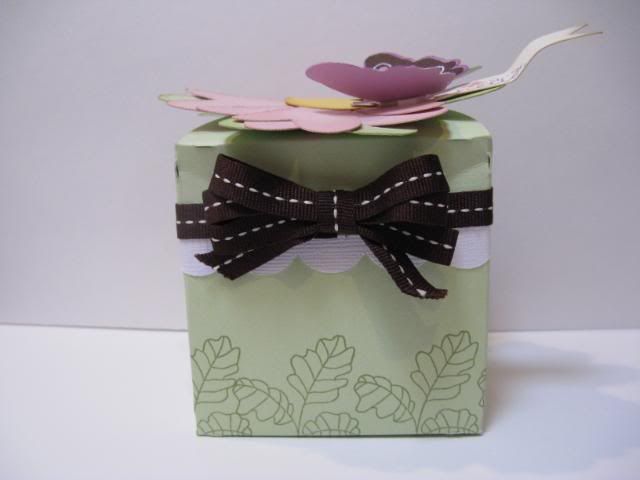
Now I did do more than one and a look at all three 


I was cleaning my brown shoes when I thought why not try a Faux leather technique? I am afraid my mind gets only so creative - no feathers and no shakers. Give me metal and power tools LOL. Ok - maybe I concede to a little beads, some bling , maybe a tiny bit of ribbons and of course more tools like heat gun, stamping. After all I am a girl - well when you hear my teenage son say it - a woman...old woman... sigh. How can I make him understand that the female of the species are all forever sixteen???
Well... coming to the purse
Here's how I "dun" it.


Well hope you enjoyed the little bit of comic relief there.
Getting serious
For the brown bag - I took a length of brown book covering paper roll and cut it about 3- 4 inches more than 12 x 24 so making that  16 x 28. You can do this technique with a brown shopping bag too, but as I didn't have any I stuck to this. 
I took the paper and crumpled it.


Now before the next step - I had to make a decision. I knew that because of the crumpling and the air pockets formed it will not cut right in the cricut as the blade will skip over the pockets. So I decided to glue this down to another paper. This would also stabilize the paper as the brown paper is a little thin.  I decided to use the same brown paper . You can cut this paper also 2 inches more than 12 x 24 in case you make a mistake but with this technique it will not matter and as I have a creatopia I just passed it through that. Atg gun will work fine but with that you might want to have the paper wider and longer. Here take care to stick the shiny sides together for 2 reasons
1) polish will take better on the dull (not shiny side)
2) shiny side will not stick on the cricut mat.
so glue the shiny sides together
  

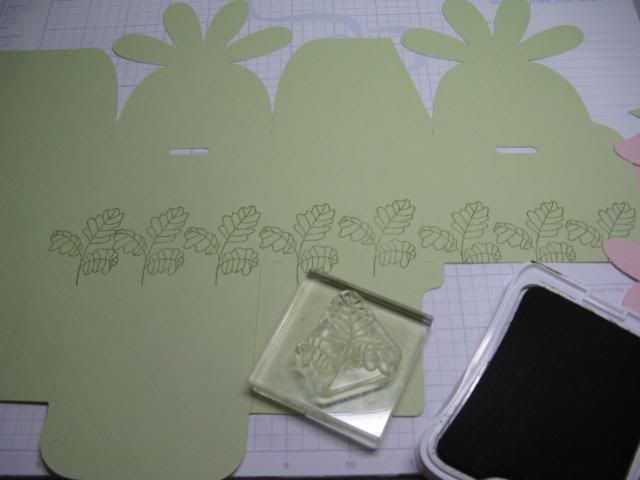
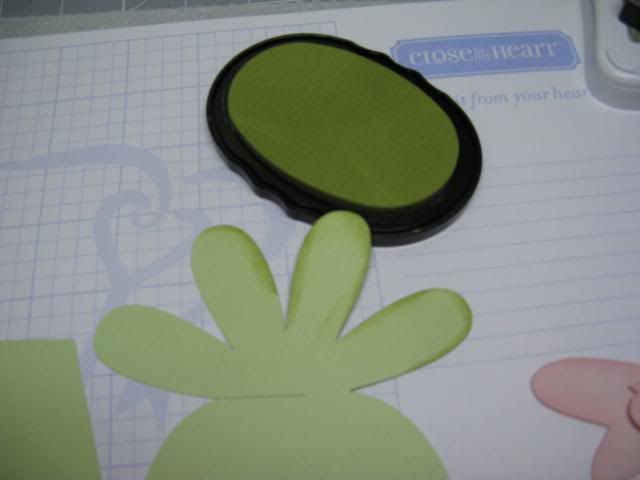
and apply brown (or black) liquid shoe polish. If using the other grab a sponge. I found the liquid easier. You can of course use regular ink but I liked this better for how apt the usage of shoe polish for leather.

wow - look at that - my hands and paper - a perfect camouflage.
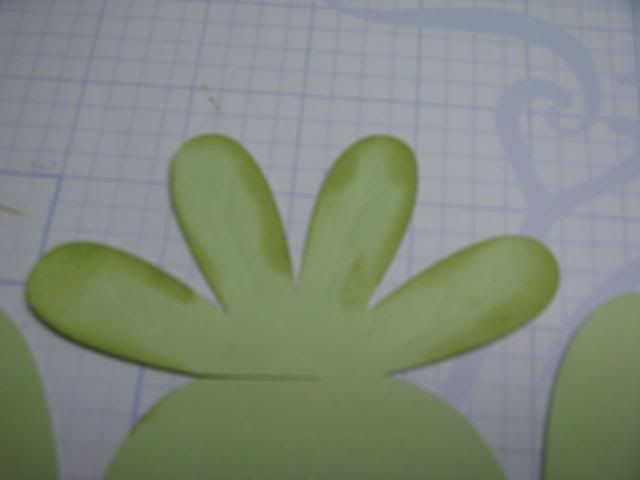
So after applying polish which I did on both sides - front and back and allowing it to dry I cut the paper out.
Now a brief look at  my G file.
This is page 1 of my file

I have used the black out feature of pg 118 & welded another shape from pg 112 - a pocket folder or library pocket as I wanted a strap like closure.

 I also used the same shape (blackout) for forming pockets in the purse. I delinked the width and height i.e turned the golden chain off (white) and rotated it to check with the template in previous page. I didn't want the closure to overlap in some places and I did not want the side pockets to be more than the ... ha ha sides.

I then cut page 1 and 2 and scored & glued using ATG gun and little bit of zip dry glue
This has 10 score marks. It needs gluing with ATG or red tape on the outsides except for a couple of spots which can be optionally glue (in the insides). (When you weld sometimes the score marks goes away depending on the purse)
I of course wanted to add the pockets  and the beads which I did before gluing down the sides. I also used opaque markers - Souffle 3d  markers to draw stitch lines & this too before gluing as it is easier to work when it is flat. For the beading I was able to slightly peel apart the layers a little and hide the back of the work which was a huge advantage. I used thin metal wire which went inside a needle. I then later stuck the layers closed with zip dry glue.
 I found it easier to first fold in the half circles and then the glued small tab and then the larger side over it all.
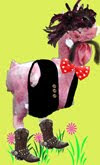
Here's an inside view of the purse and also the handle I made with beads & shoe lace (yep - but you can use the leather strip for this). I attached the round wooden bead to the purse with a handle strap(cut by hand) and brads. Added velcro  for the closure and the bag was done. After finishing sprayed a coat of clear glossy sealer.


The second purse
 can be made with two -  12 x 12 sheets taking care to overlap at the bottom and adjusting the file (page 3) by moving it to the appropriate point point before changing mat size to 12 x 12. I used another 12 x 24 sheet and attached the pattern paper as it was thin. For the window I have used a shape form storybook and made the frame on page 4 (by increasing the image , then delinking the golden chain and adjusting the height and width to form a frame)
Here's the file view

I stamped a piece of vellum , colored it and stuck it behind the purse window and added a frame in the front. Some half pearl stickers just peeled and glued and a button with shank cut off and added with glue dots and for the handle - just a bead garland - which my son gave me for Fat Tuesday. I cut it and punched a hole in the sides slipped the beads in and taped it.The metal jewelery glue came in very handy.

Pattern Paper used for both this and the next purse is from Deja' Views Home collection.
I used the file on page 1 and the buckle on page 4 (image on the left) for this purse

I cut the buckle with chipboard, versamarked it completely, applied silver embossing powder and when it was still hot and wet stamped it with a medallion stamp I had  to give it texture. IFor the handle I just took a chain and slipped beads and glued it with Alene metal jewellery glue to keep them in place and attached it to the purse with brads. The purse looked kind of empty  so to embellish I just took strip of black cardstock - used fiskar plates called braid (I call it plait LOL) and then cuttlebugged it (sandwich is - A plate, fiskar plate,the cardstock which needs embossing,  2 embossing rubber mats (or rubber gaskets) and B plate. Then inked with silver ink and glued it in the edges. To the handle I stuck some chain and also glued a silver button (again with shank cut off)
Here are the 3 videos. You can also watch it from the youtube channel - TheBugBytes


The gypsy file is available in the file section. Hope you liked the simple project...and get to walk barefoot wherever you are if the weather permits ....


March 2, 2010

ruffles......and a very late shout out to Cher B!!!

First of all I would like to say what an AMAZING job CHER did on her Tuesday Treats project!! I was totally blown away and I feel so awful that I didn't get a chance to comment on her adorable bags!! CHER they are the BEST!!! do you hear me?? the BEST!!!! :):)

Second of all.....I left this project to the absolute LAST minute...and I mean LAST....as I type this blog post it is 11:55pm on a Monday evening and I should be in bed :) That being said I still wanted to try and get this out somewhat on time.....sorry for the delay!!!! This working for a living thing....geez......


My mission....should I choose to accept it is to create a purse from page 116 from Tags Bags Boxes and More.  I'm so glad I did!!  I DID NOT know this purse had the cutest little strap on it to do it up :)  how sweet is that!?

Here's what I came up with folks :)


Oh don't you just LOVE ruffles????  Here is how I did it:


Now to put this cute little purse together.....

Start by laying out all your paper on your cutting mat - for those of you that are new:  Remember to count how many squares your image takes up on your Gypsy screen as this corresponds to the squares on your cutting mat.  You will get correct paper placement every time if you follow that tip :)


Next you will cut it either page 1 or page 2 - you can only cut 1 page at a time with this file.

Then go ahead and cut the second page once you get your paper on :)

Once you have everything cut out you can either start with scoring your purse, or you can assemble your little butterfly shaker.  I decided to start scoring my purse.

When scoring....take your time to do this as accurately as you can.  A well scored purse will result in a purse or box that assembles nicely, all edges line up properly and there aren't any smushed pieces of paper anywhere :)

And here she is all ready for assembly....

As you can see from the picture all the lines have been scored and the purse is starting to take shape.  So BEFORE I glue the purse together I decided to start 'threading' my ribbon through my slots.  I just went back out one side and brought the ribbon back in through the SAME slot to get a ruffle on the outside.  Then I just moved up to the next slot with my ribbon from the INSIDE of the purse.  Just work your way up and take the time to try and keep your ruffles even....this part takes patience :)

But if you do it right ~ you end up with this :     :) :)
also if you look closely you can see that I just brought my ribbon right around to the other side on the bottom.  It looks very pretty and you don't have to glue anything down.

Once you have your ribbon threaded, just get out your trusty WACKY TACKY TAPE and glue down those folds on the inside of your purse.  Now I haven't found anything better than this stuff to hold purses together....so if you have something that you absolutely SWEAR by - please let me know :)


Once your purse is together you can move on to making your butterfly shaker and the front of the purse.

Remember that piece of purse that we pushed off the mat just to get the front piece?  Go and grab that and get your exacto knife out too :)  Using your ruler (cause I know my hand is NOT steady at all) and trim off all the excess pieces of the purse.  That would be the tabs and the little pieces right at the bottom.


Just set the patterned paper aside for a little bit and grab your 3 butterfly cutouts and your clear transparency sheet (yay I still remembered what it's called!).  Take 1 at a time and glue them on top of eachother.  Your making a butterfly sandwich :)  Once you have them all glued together stick down your transparency sheet on top (this is going to be the top of your shaker and also the side you glue your patterned paper onto.


Be sure to do a good job gluing all around the edges....you don't want any little beads getting out!!!  They are a pain!


Here is the back of the shaker piece.  As you can see I've glued it to the patterned paper and have added a clear window on the back too.  I decided this was necessary after I had designed it on my G - I will add the extra piece in the file.  I also went ahead and cut out a rectangle in white cardstock and ran it through the cuttlebug.

I thought this would look a lot nicer than just a boring orange background behind the beads.  I used my all time fav- swiss dots for the embossing.....I just might have to buy another one it is so well used! lol!

That's it!  Once you have the front all glued together and it's dry - go ahead and glue it to the front of your purse.  You can take a hole punch and punch a much smaller hole (than what the cartridge had on it) for your brad to fit through.  Just use the hole that is on the inside of the purse as a guide.  Insert your brad and TA DA!!  Finished!!!  Not as hard as it looks eh????

Now go and find your FAV gems and glitter and pearls...whatever is your go to embelly and get to work dressing up that gorgeous butterfly :)


Love this pic....it really shows how well the cuttlebugging adds to the background of the shaker.  Gotta love that BLING too ;)


oooohhhhhh RUFFLES!!!


Well, there you have it.....my take on page 116 of Tags Bags Boxes and More.....what do you think?

A hit or miss?

As soon as I get home from work tonight I will upload the gypsy file so you can all download it and take a look at the measurements.  I figured I didn't need to add it in the post :)

HAVE A GREAT DAY!!!  KEEP YOUR FINGERS CROSSED I FINISH WORK ON TIME TONIGHT! LOL!!! :) :)